



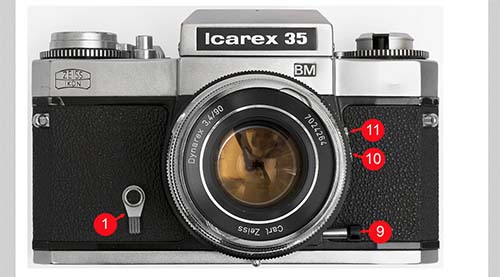
The Icarex 35S is the successor to the Icarex 35. It no longer has interchangeable viewfinders, but instead features a built-in light meter. The light meter operates using a working aperture measurement system – this means that, whilst measuring the exposure, the lens must be stopped down to the intended aperture value. This carries the risk that the meter’s needle may no longer be clearly visible – a problem that many SLR cameras of that era with on-camera metering suffered from. The Icarex 35S has solved this elegantly: a small window on the front of the camera illuminates a light frame around the meter display, ensuring that the needle remains clearly visible even when the viewfinder image is dark. A nice feature! Incidentally, to switch on the light meter, you must both press the aperture-stop-down button at the bottom of the bayonet and move the winding lever slightly from its resting position; otherwise, no power is supplied.
Mechanically, the Icarex 35S is very similar in design to its predecessor. However, there are a few important differences when removing the top cover, which is why I’ve created a separate step-by-step guide for this model.
This is not an official service manual. These notes are based on my own repair experience with several Icarex 35 cameras. Always work carefully and at your own risk.
Removing the Top Cover of an Icarex 35 S
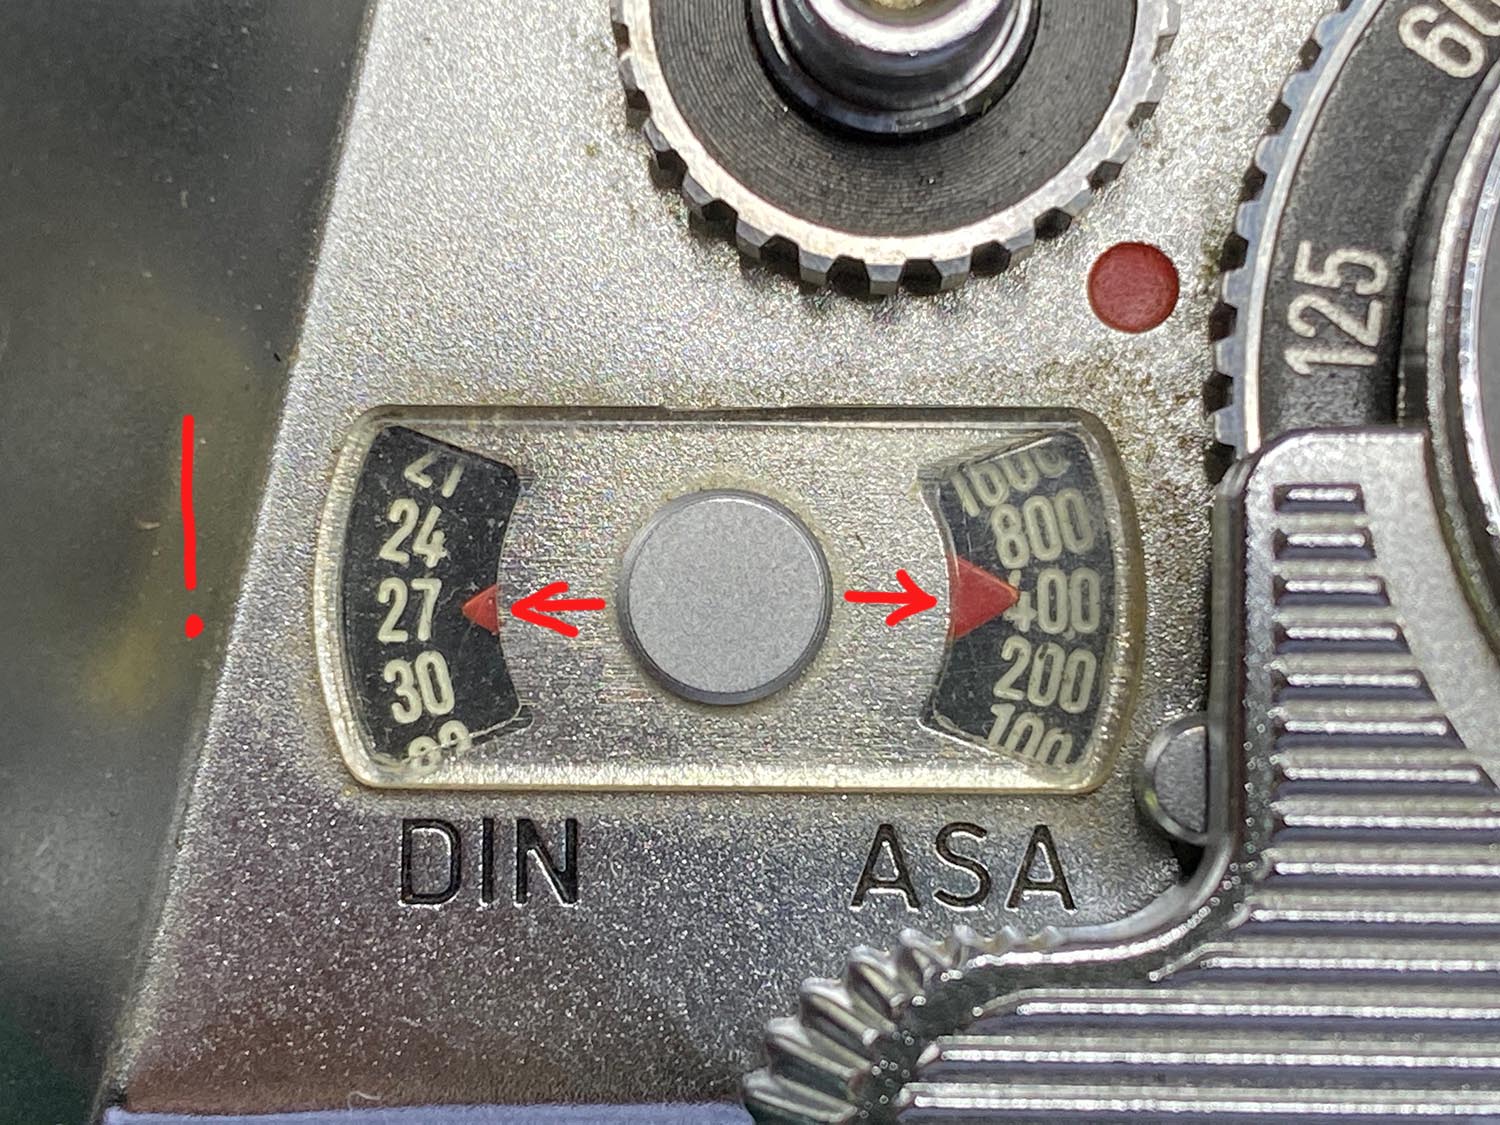
Before doing anything else, set the film speed to 27 DIN / ISO 400. This step is essential. Failure to do so may damage the mechanism when the top cover is removed. The film speed is adjusted using the dial surrounding the shutter release button.
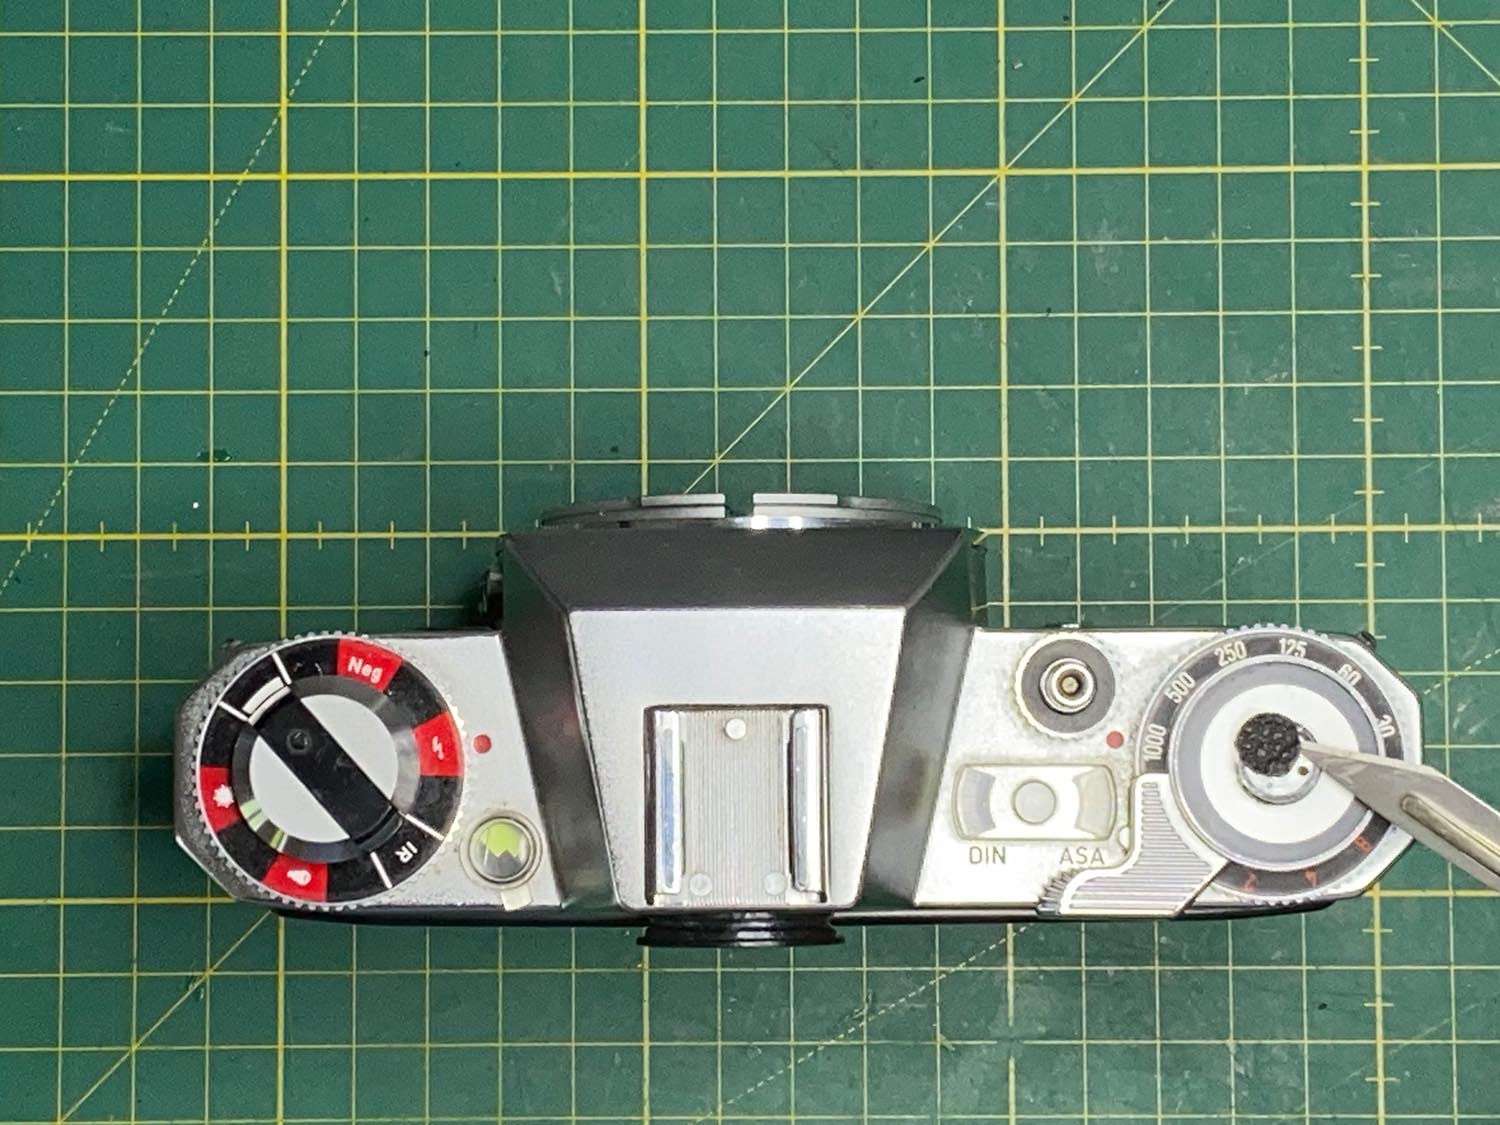
Carefully remove the leatherette trim covering the winding lever using a scalpel blade or a similar thin tool. Then use acetone to remove any remaining adhesive from both the retaining nut and the back of the leatherette. Allow the acetone to soften the adhesive for a short time before cleaning.
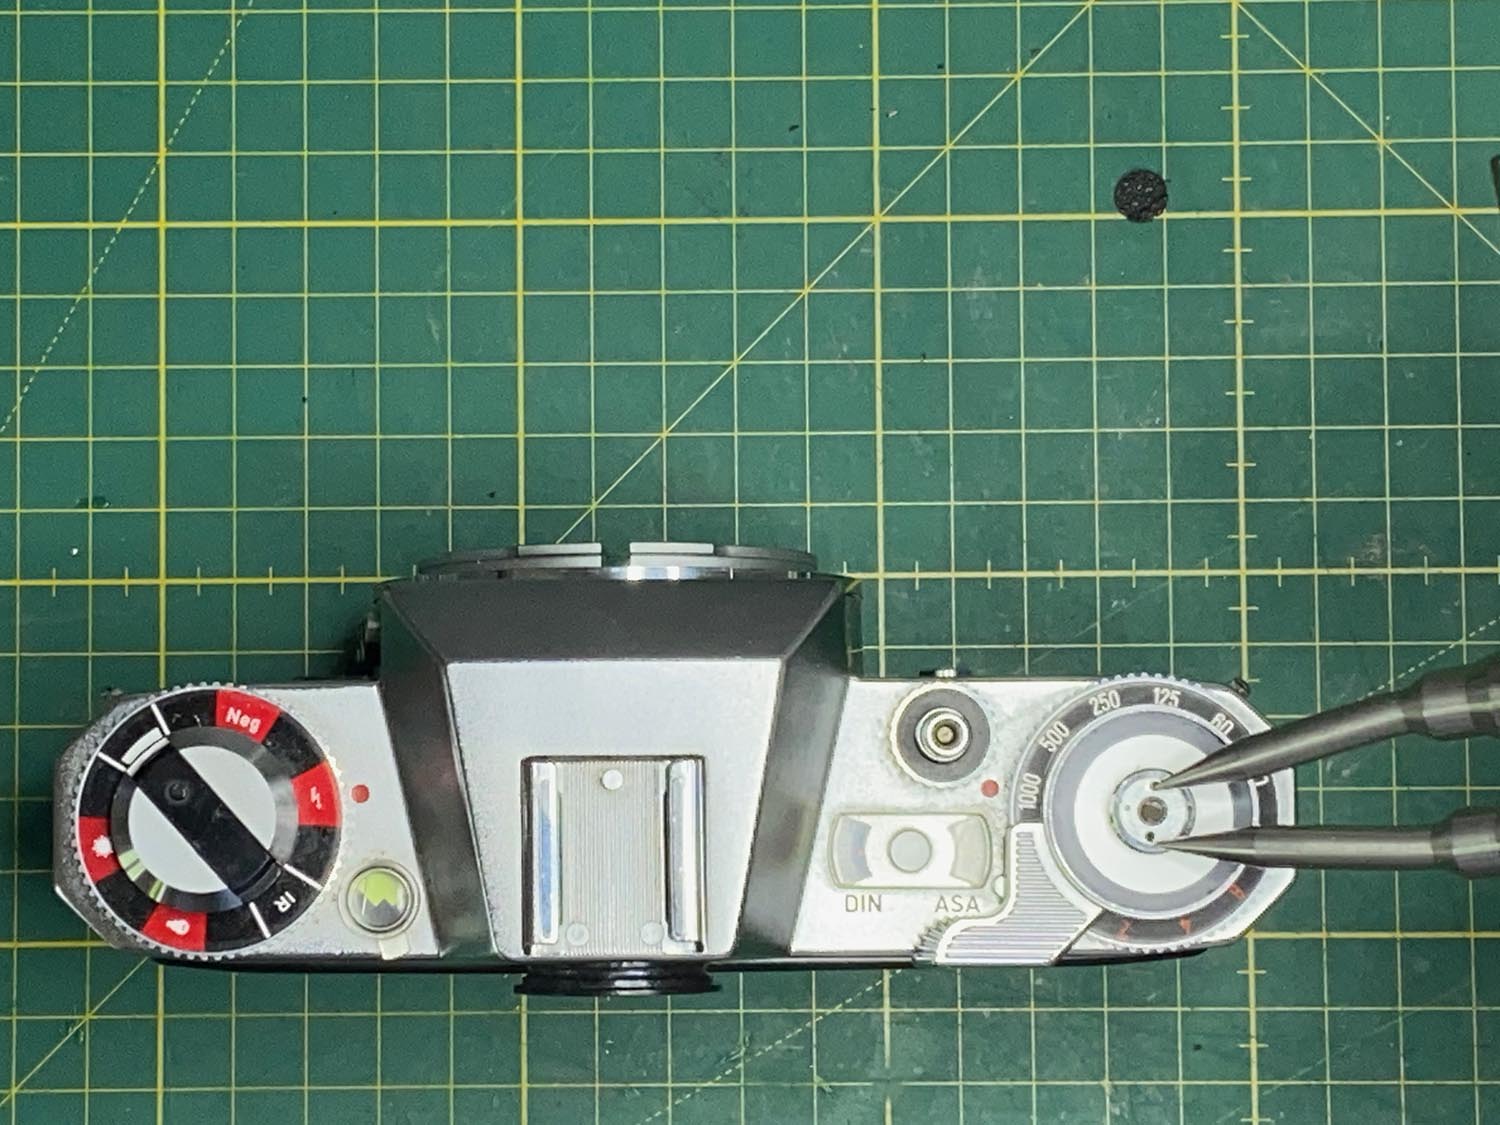
Using a lens spanner wrench, loosen the retaining nut on the film advance lever. Important: This nut has a left-hand thread. Turn it clockwise to loosen it.
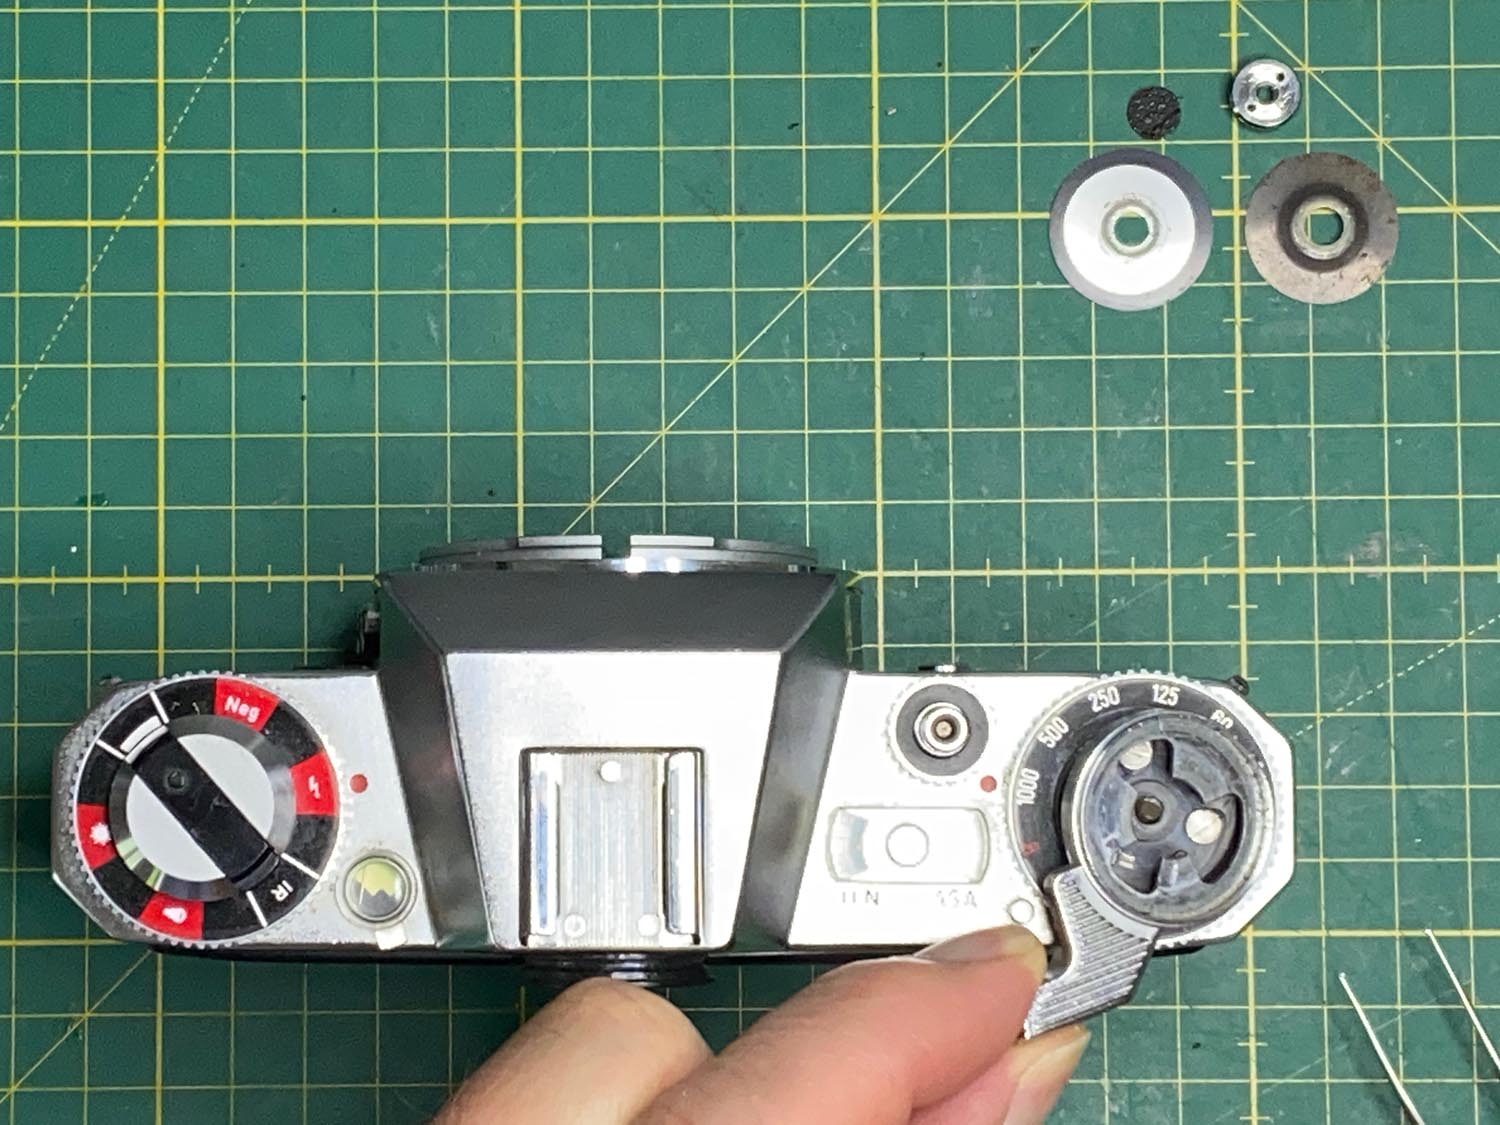
Once the nut has been removed, lift off the film advance lever together with the decorative washers. Make a note of their order and orientation, as they must be reinstalled exactly the same way.
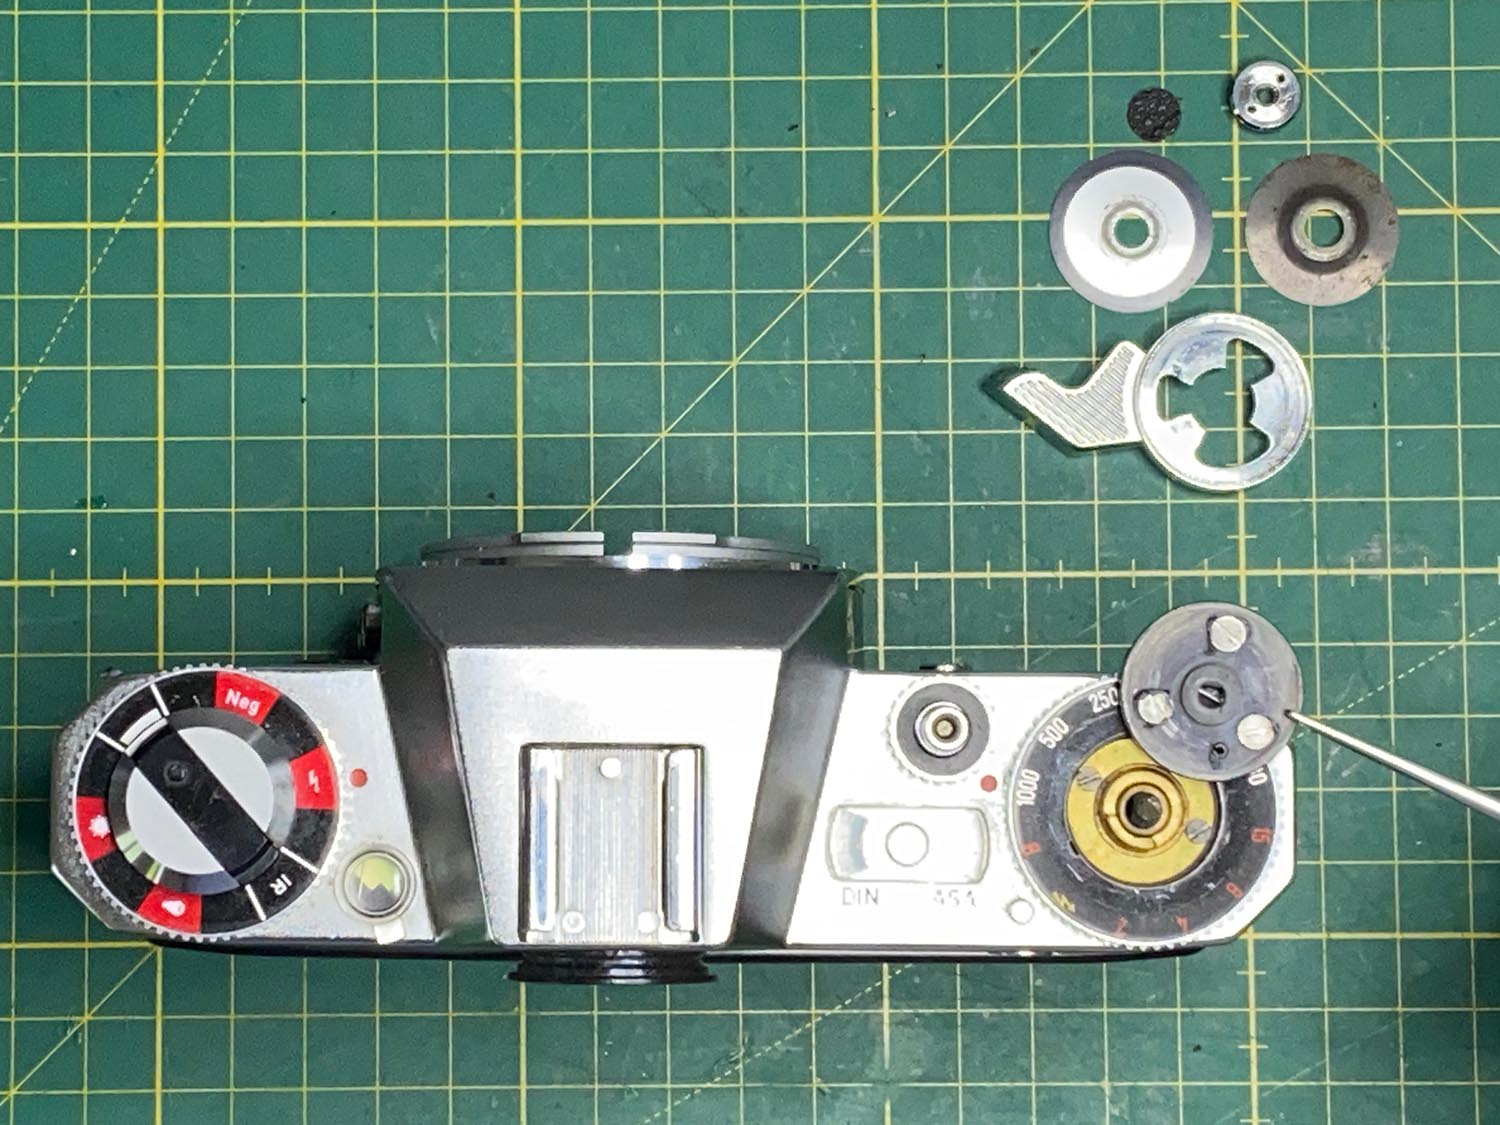
The plate secured by the three screws can now simply be lifted off. The three screws remain in the plate and do not need to be removed.
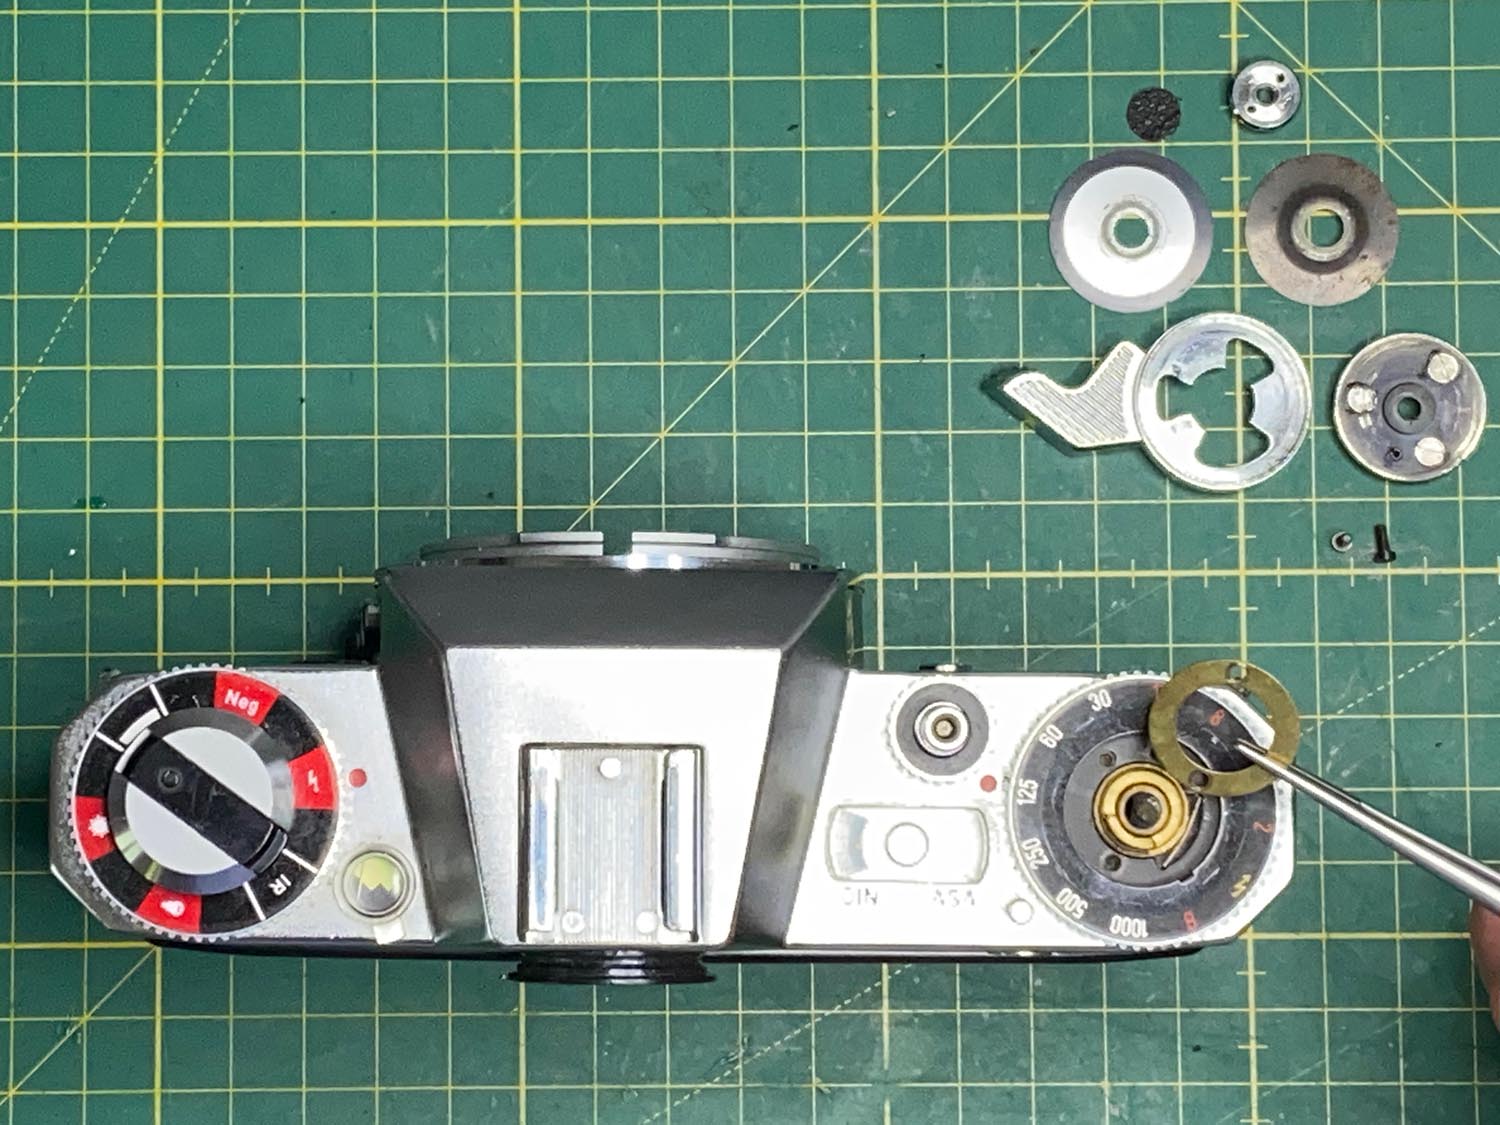
Beneath it is a brass retaining plate secured by two screws. Remove the screws and lift out the retaining plate.
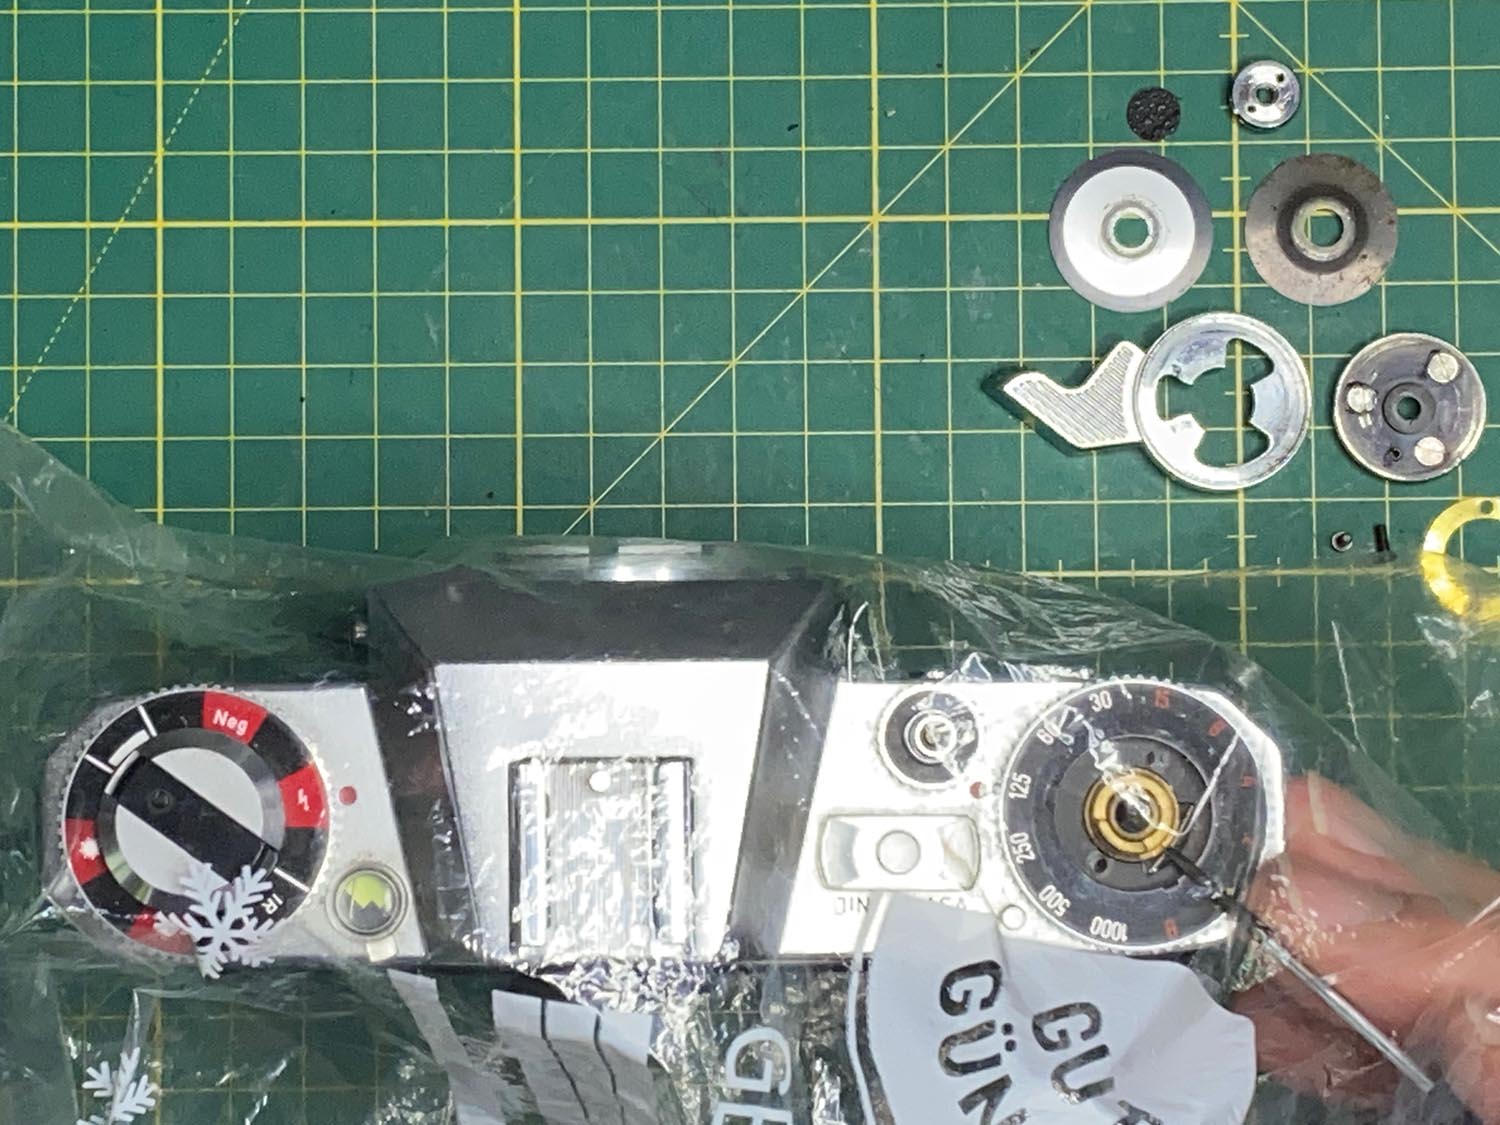
From this point on, things become a little more delicate. Beneath the retaining plate you will find a small spring pressing a tiny steel ball against the winding shaft. This spring-loaded ball provides the click stops for the shutter speed dial.
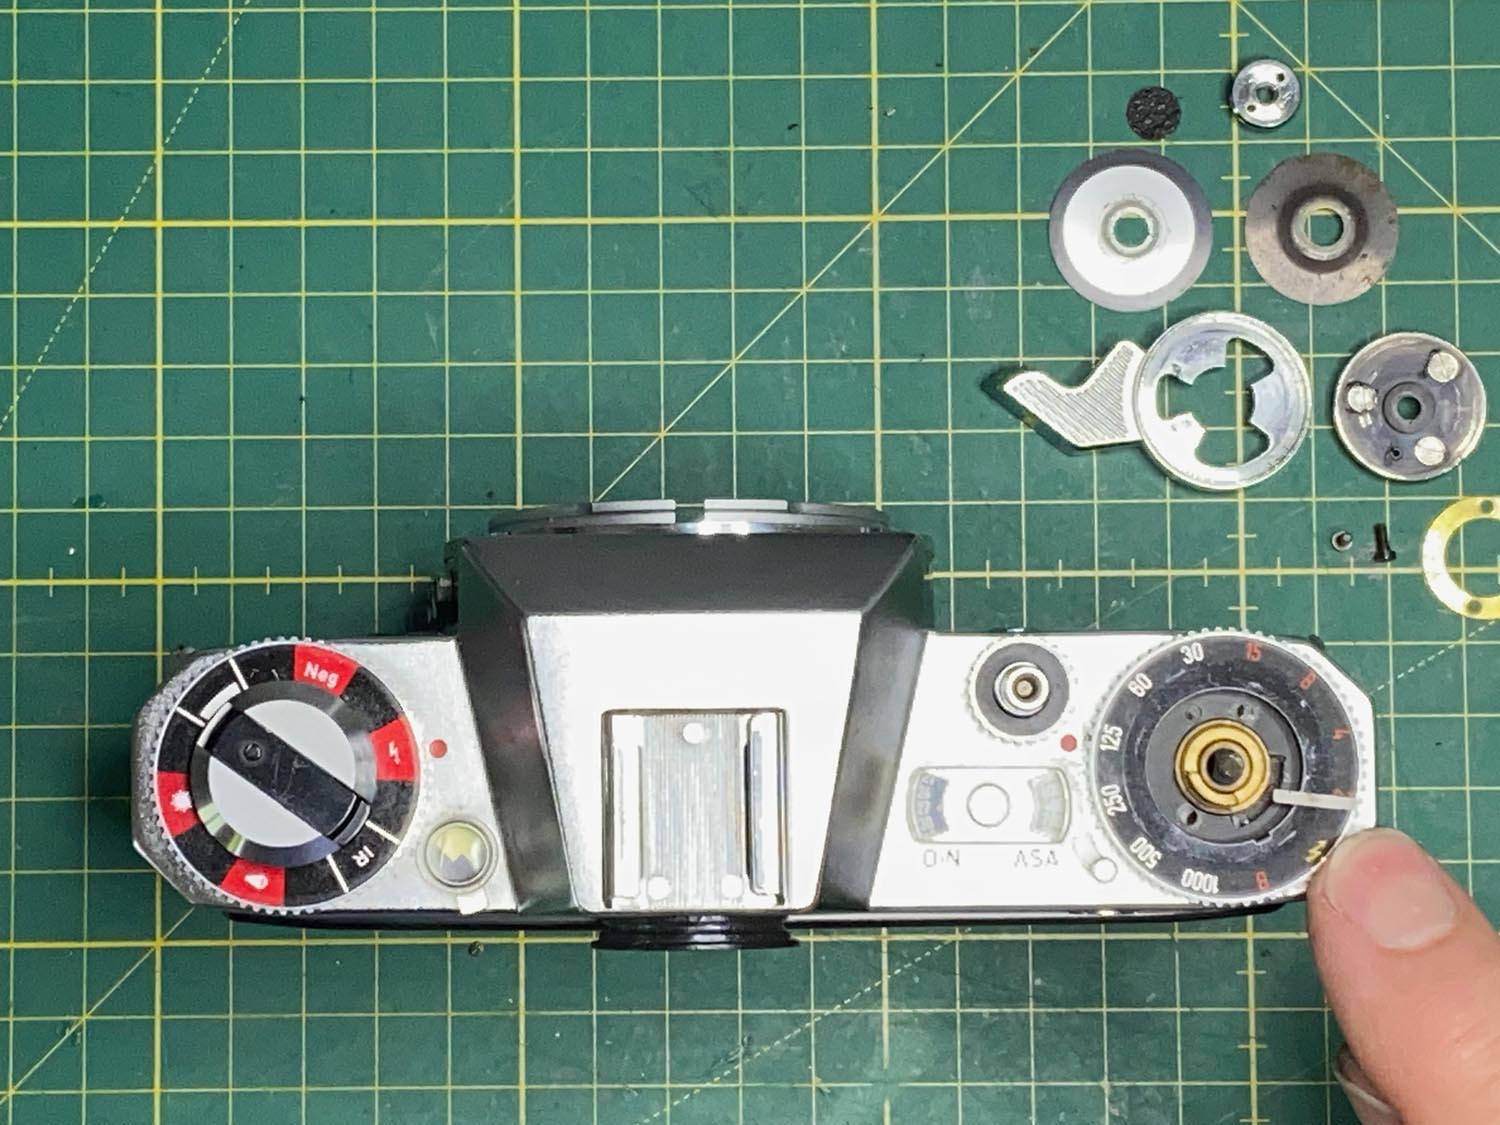
Remove both the spring and the steel ball. Tip: I usually perform this step inside a transparent plastic bag, otherwise the tiny spring has an unfortunate tendency to disappear into another dimension! Once these parts have been removed, the shutter speed dial can be lifted off.
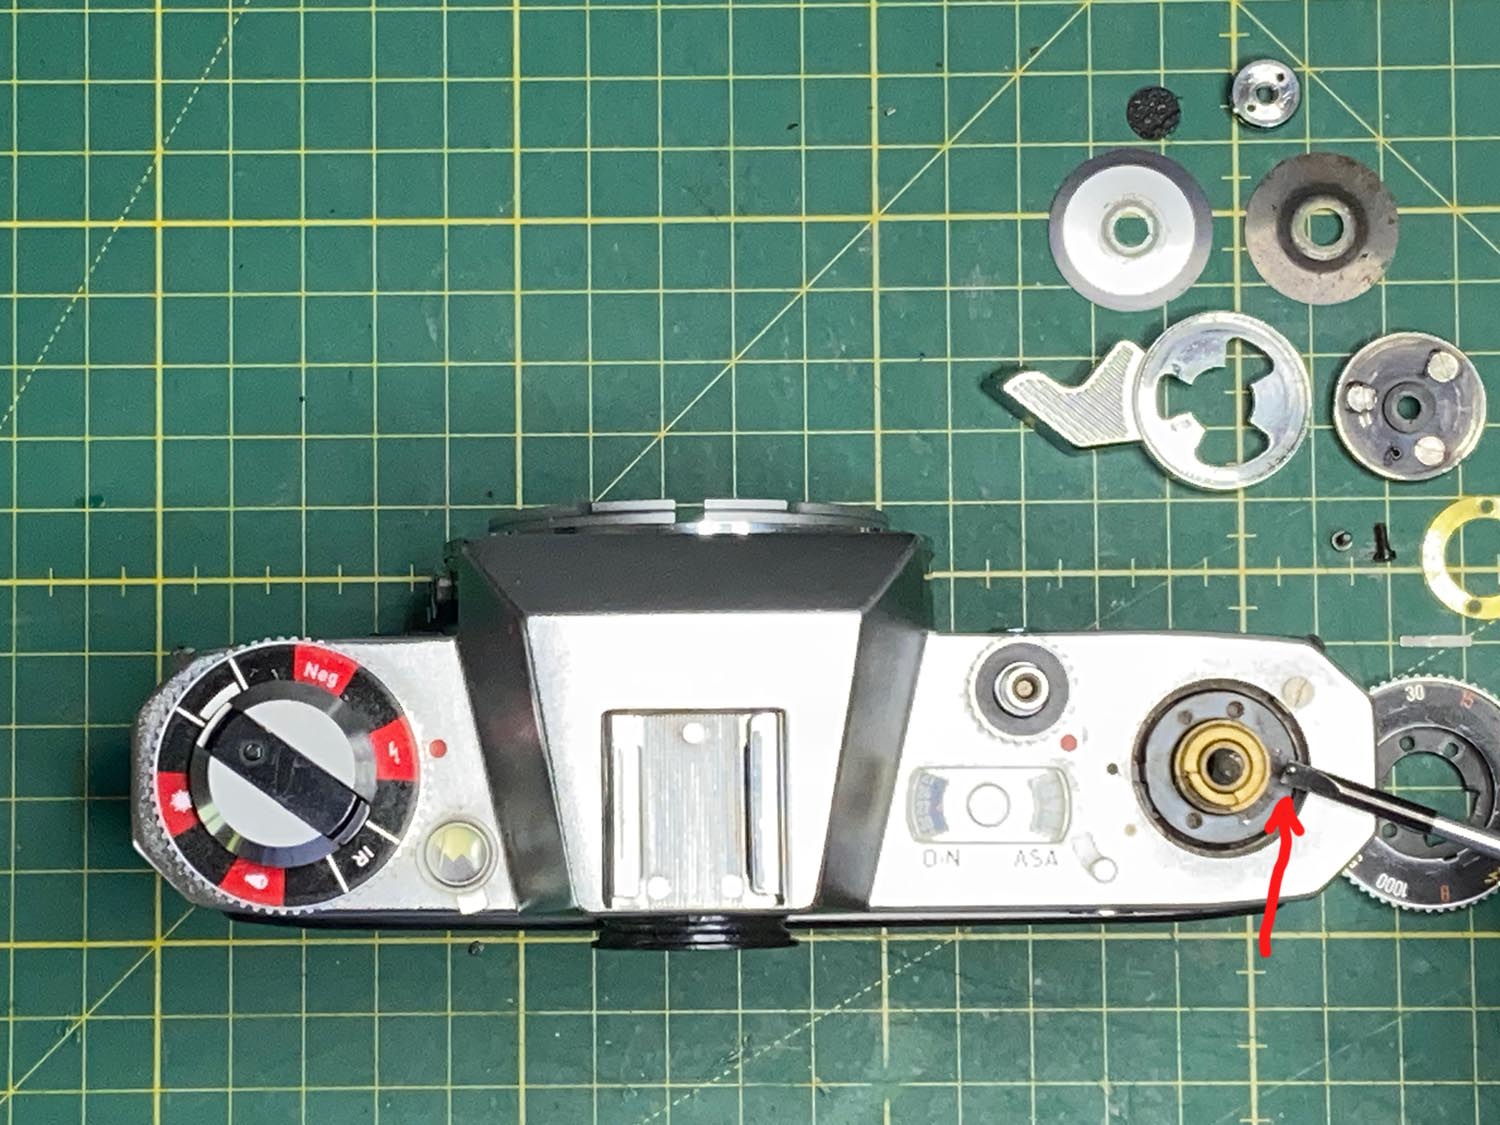
Here you can clearly see the tiny steel ball that is pressed against the shaft by the spring. Keep this ball in a safe place—it is small, easy to lose, and essential for reassembly.
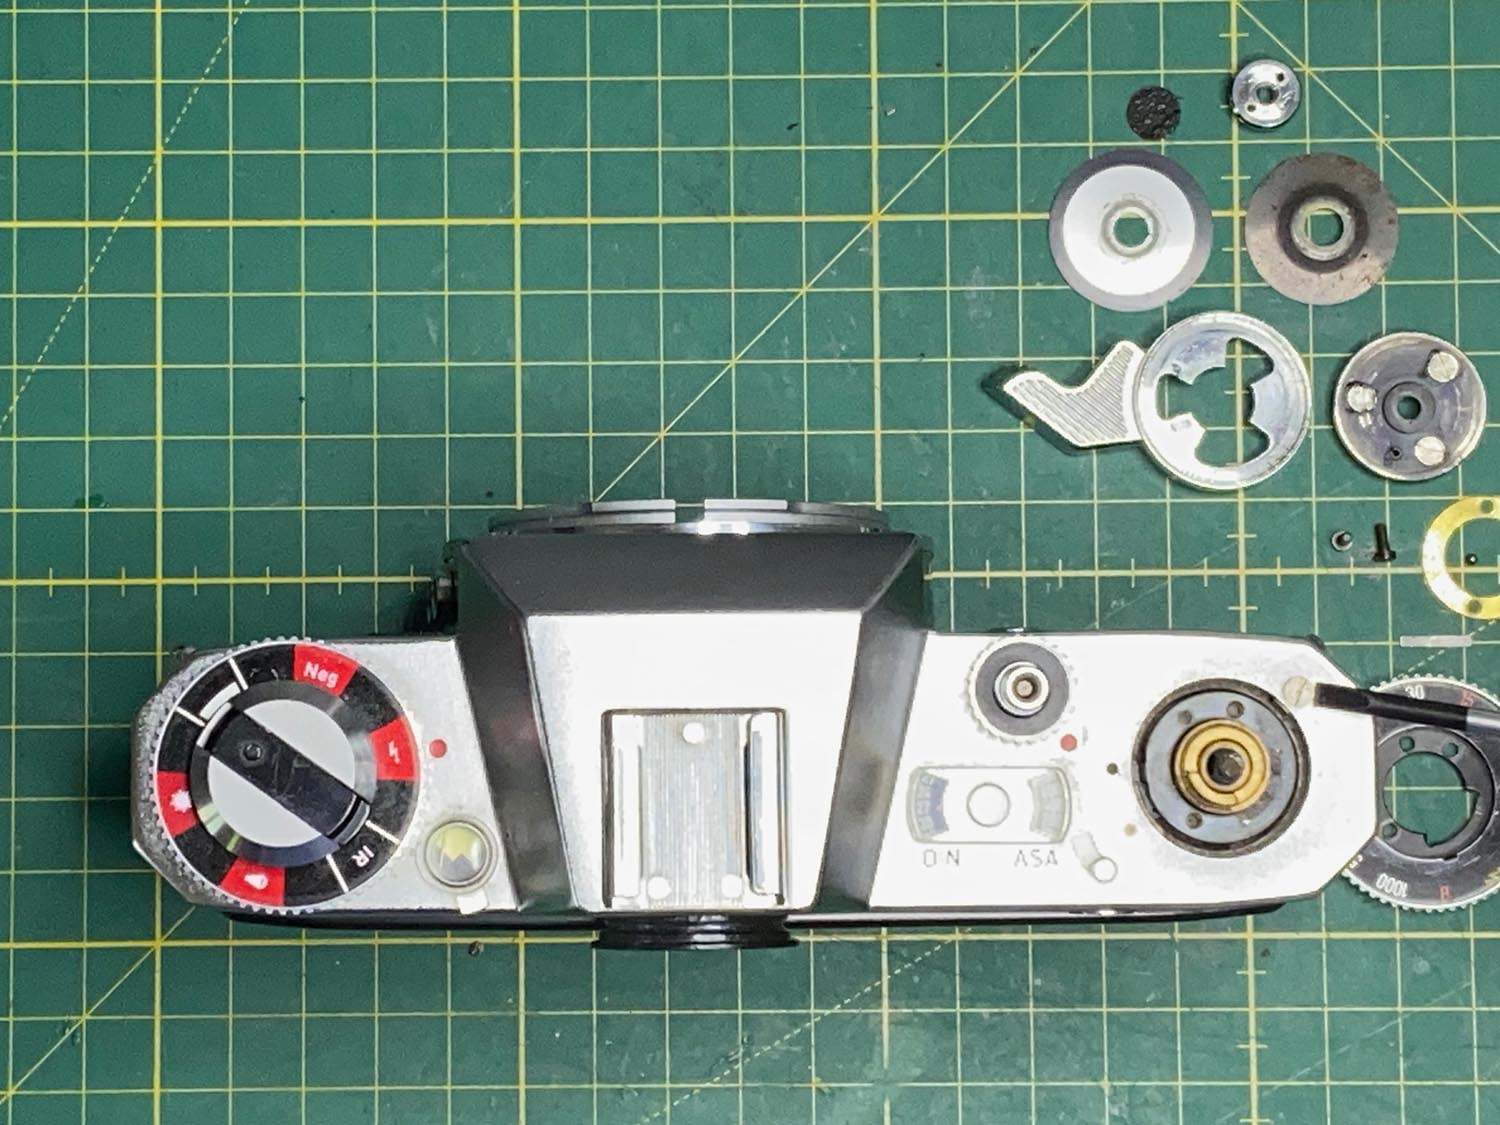
With the shutter speed dial removed, a retaining screw becomes visible. Remove this screw before proceeding.
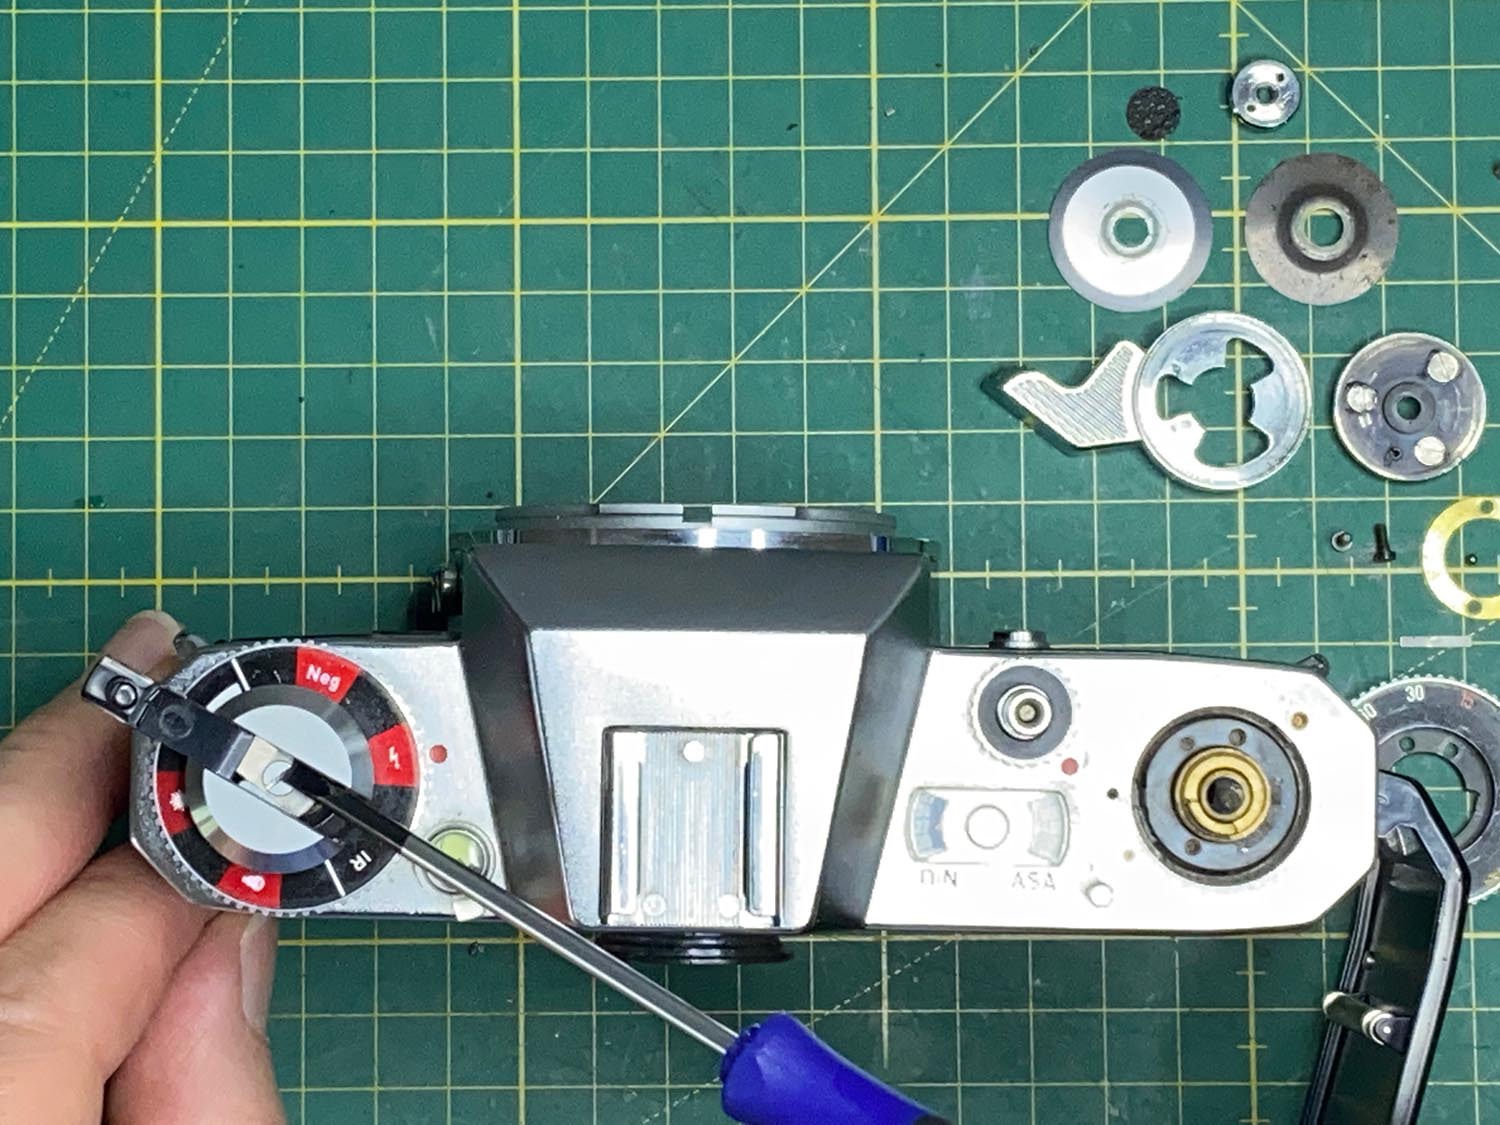
Now move to the left-hand side of the camera. The rewind crank can be removed easily by holding the film cassette fork inside the camera to prevent it from turning.
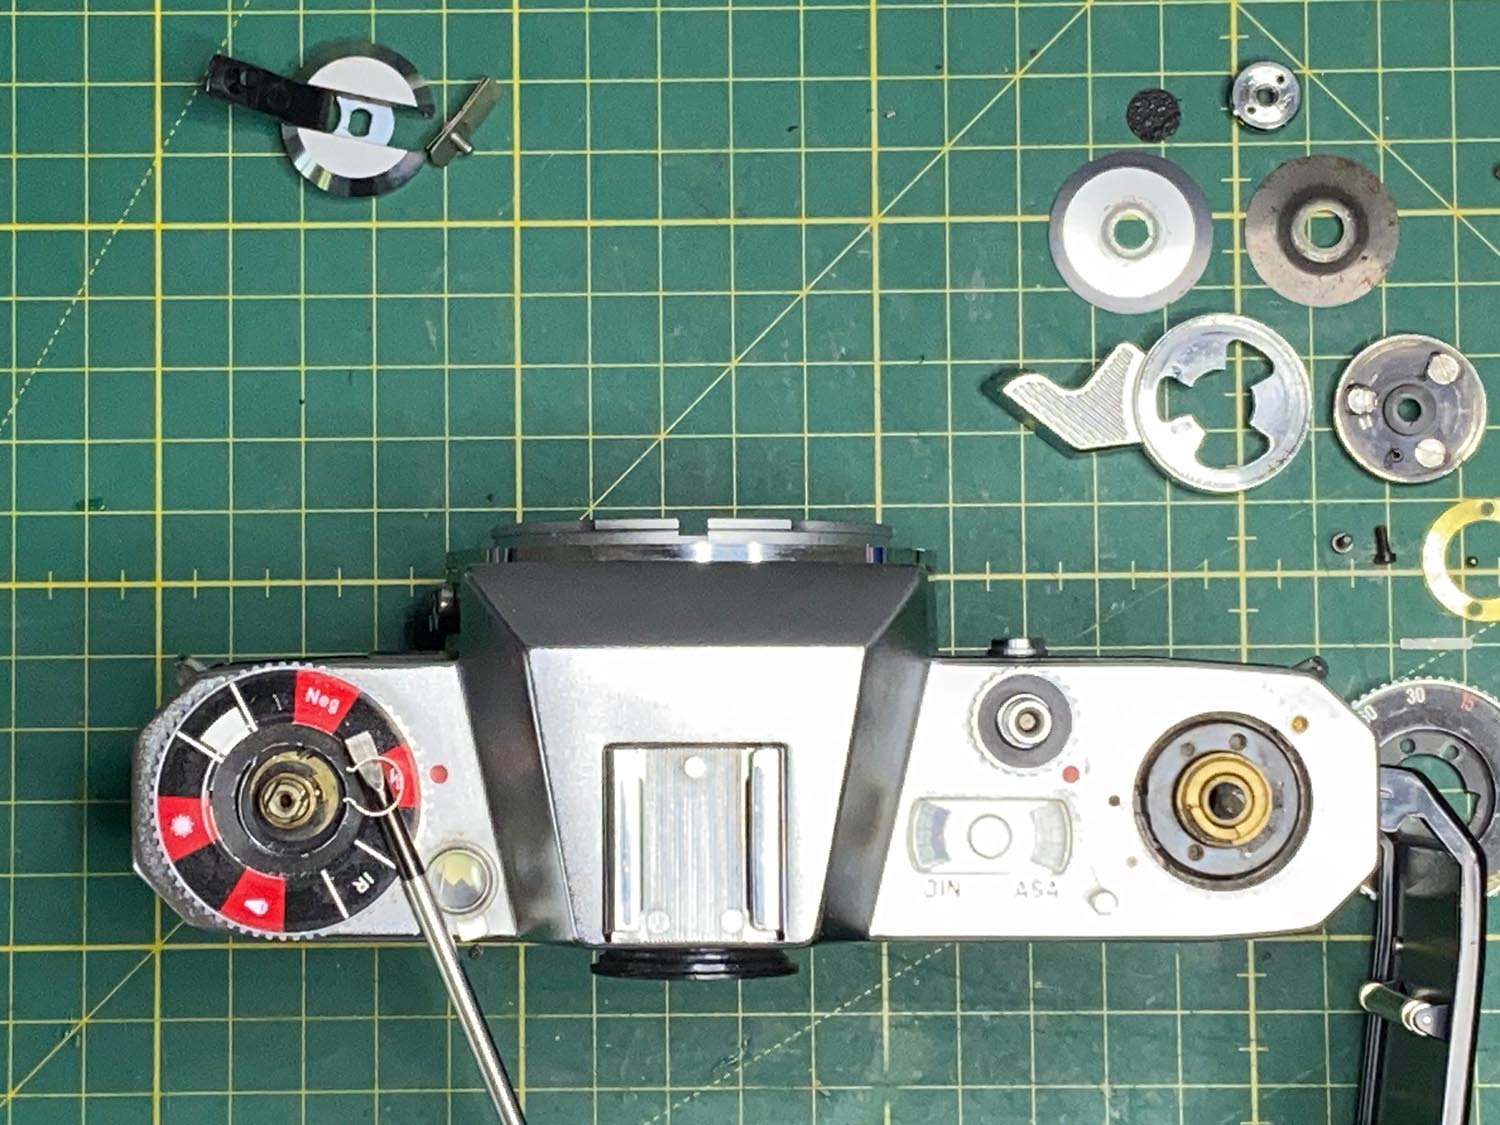
Caution: There is another small circular retaining sleeve on this side that holds a tiny steel ball in place. Carefully remove both parts and store them safely.
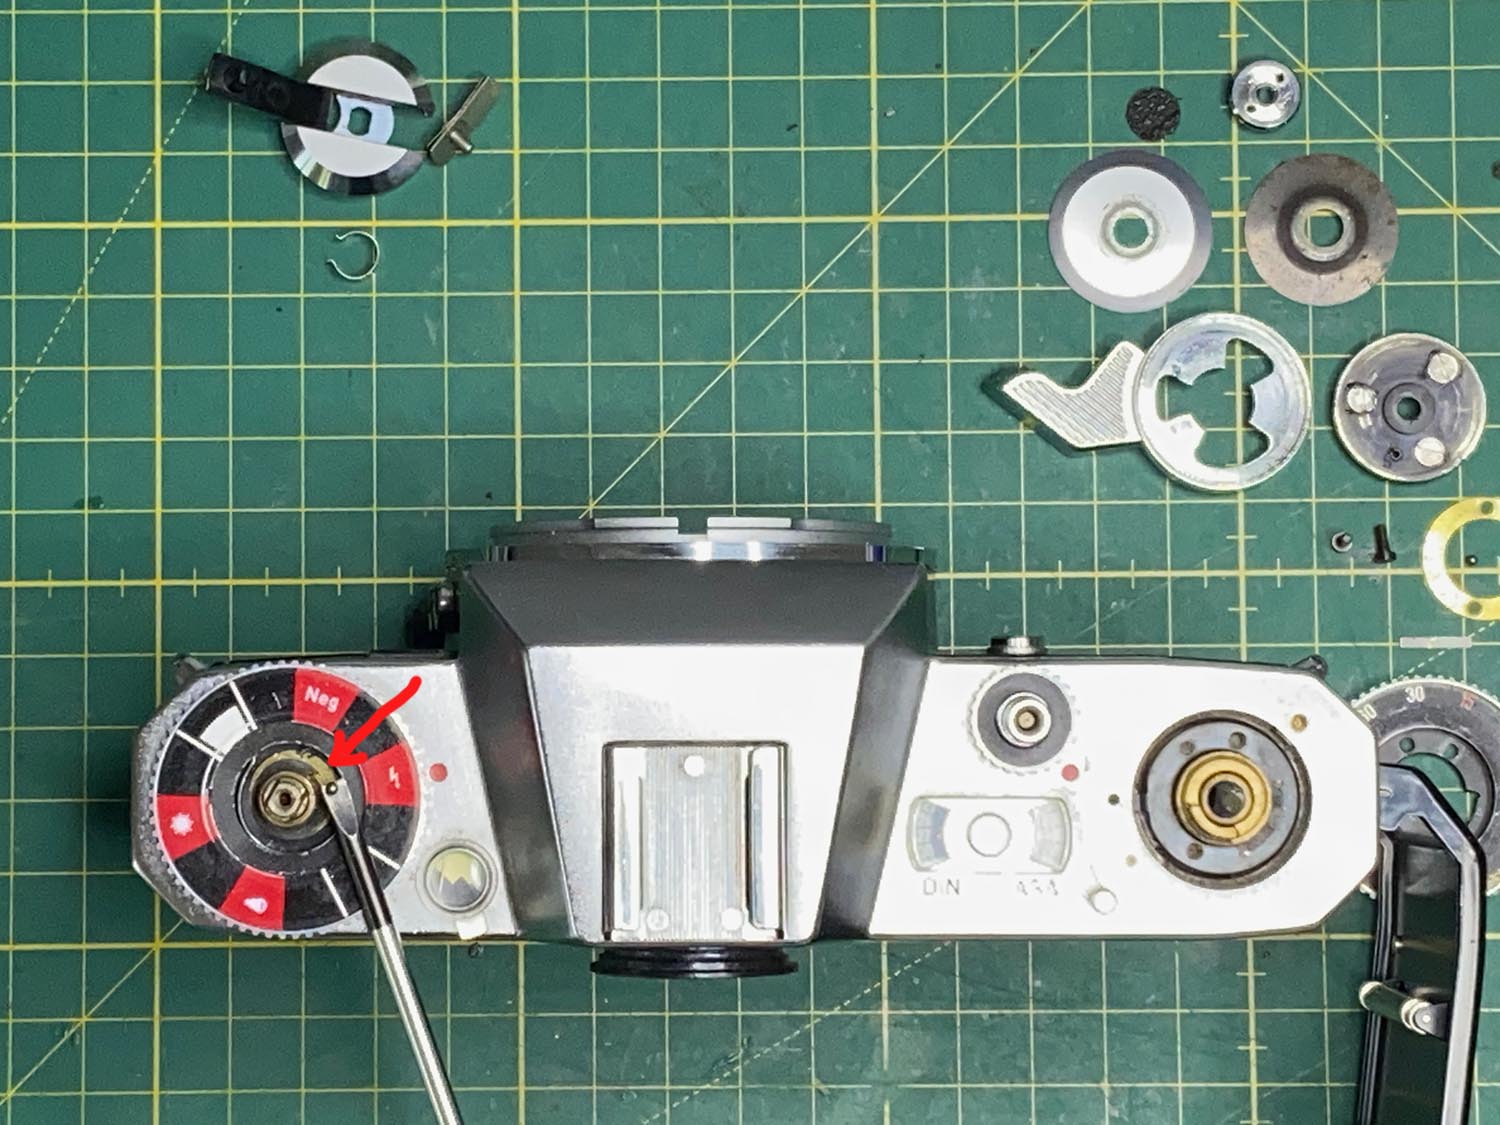
Here you can see the tiny steel ball located beneath the retaining sleeve. A small amount of ball bearing grease is very helpful when reinstalling the ball during reassembly.
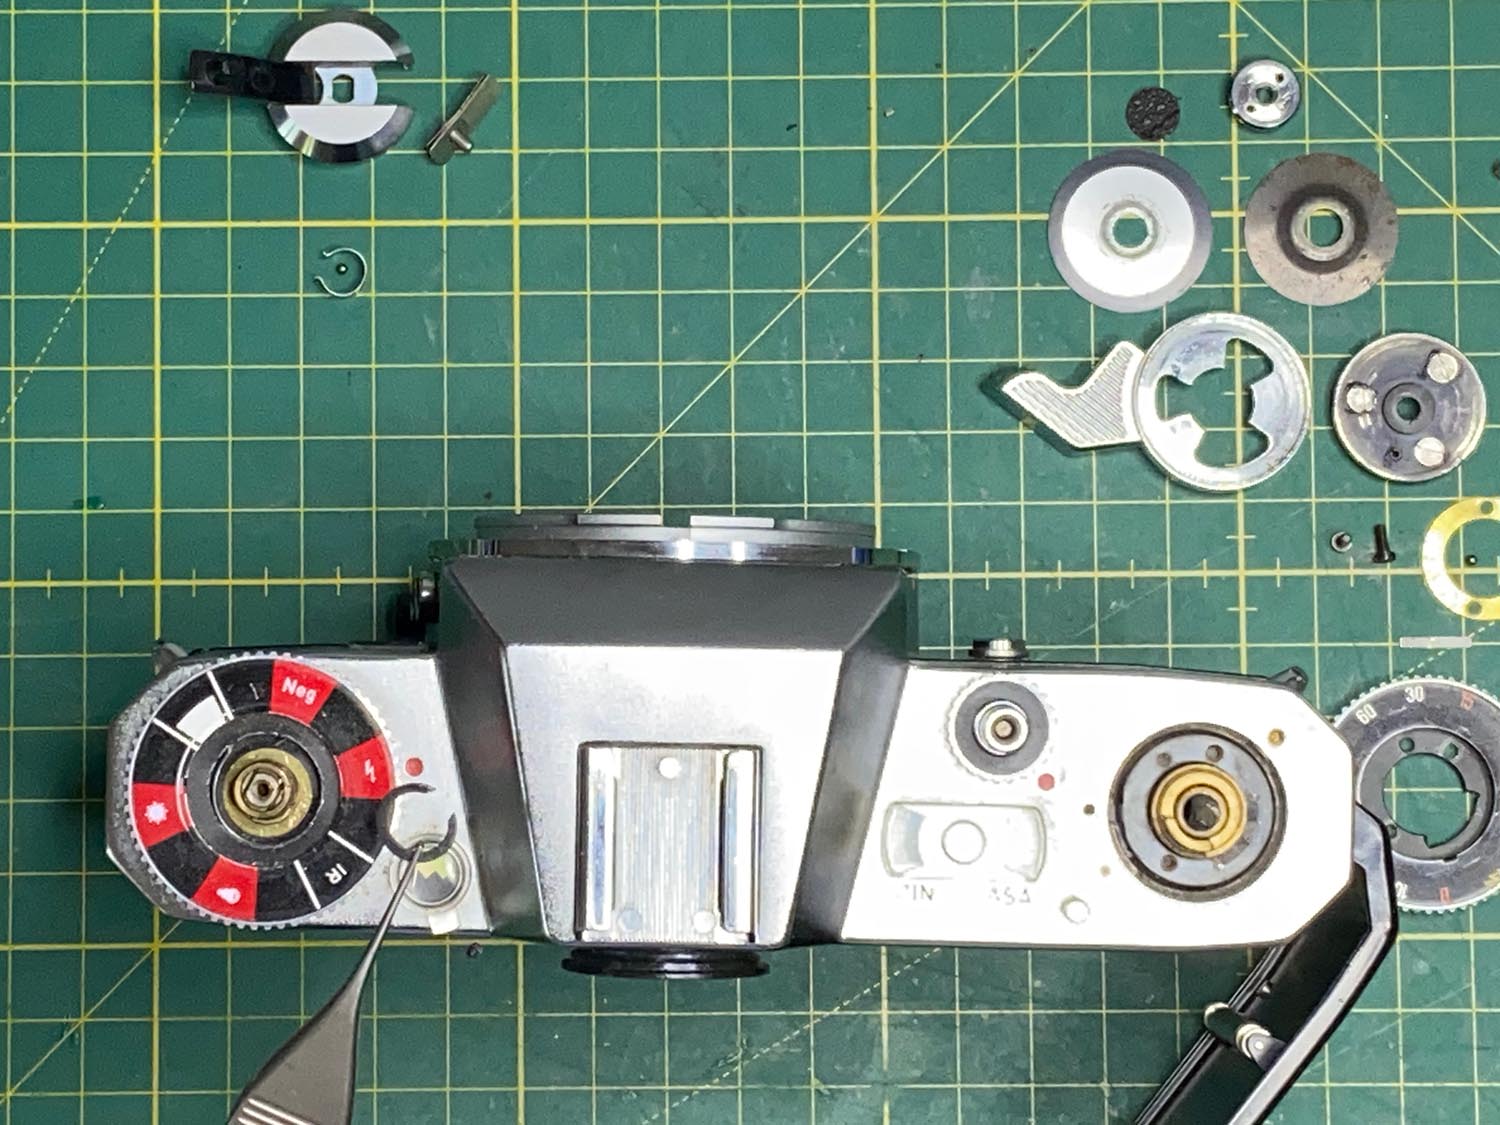
Next, remove the circlip that secures the film reminder dial to the shaft. This requires a little patience, but it can be done without special difficulty. Be sure that the ball and retaining sleeve have been removed first!
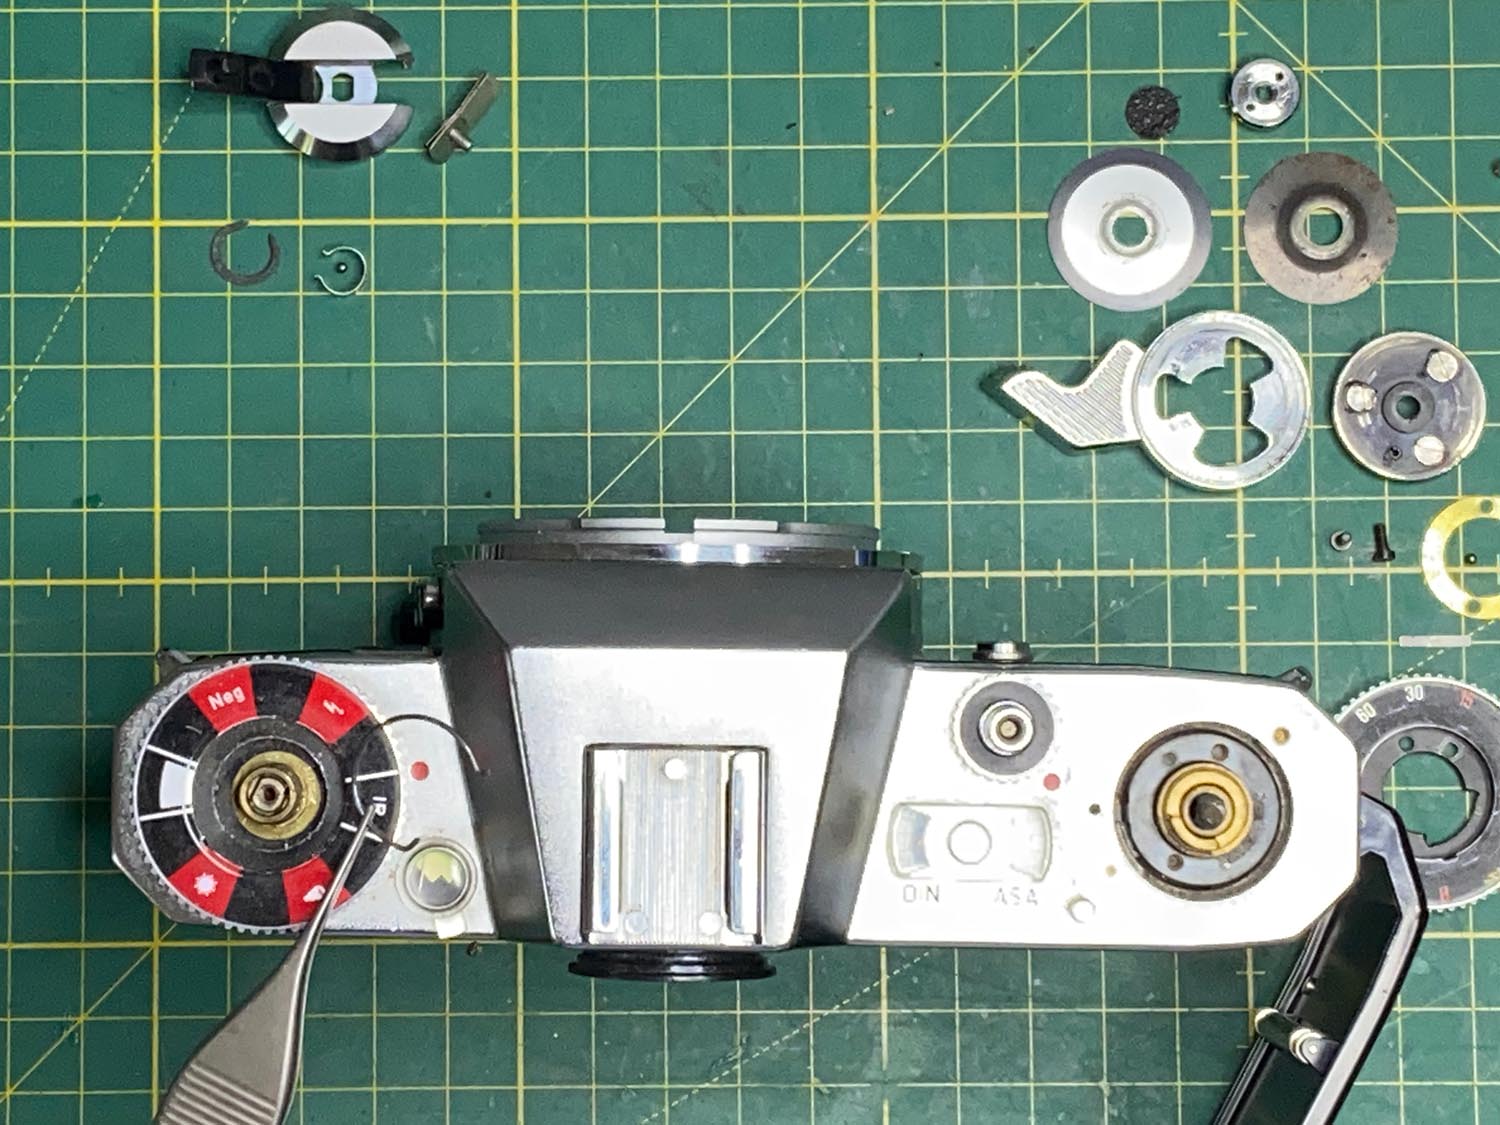
The click stops of the film reminder dial are provided by a small spring and a locating pin. Carefully remove the spring. Once again, I recommend using the "plastic bag trick" to prevent it from disappearing into oblivion.
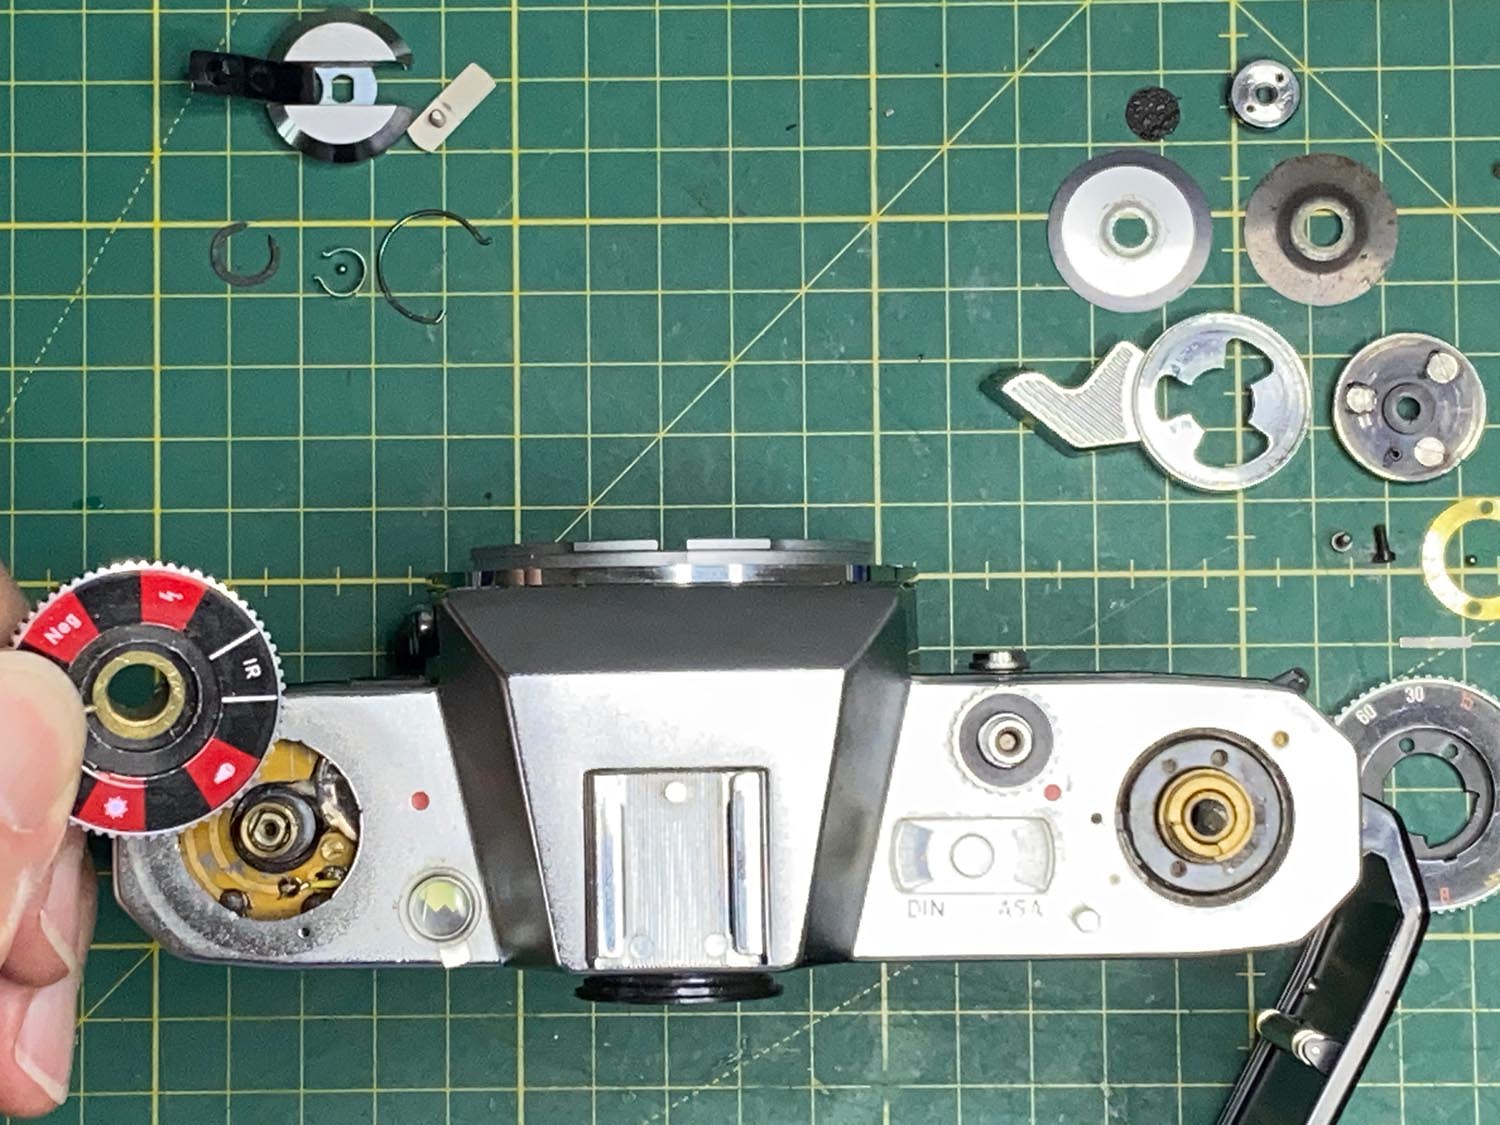
The film reminder dial can now be lifted off.
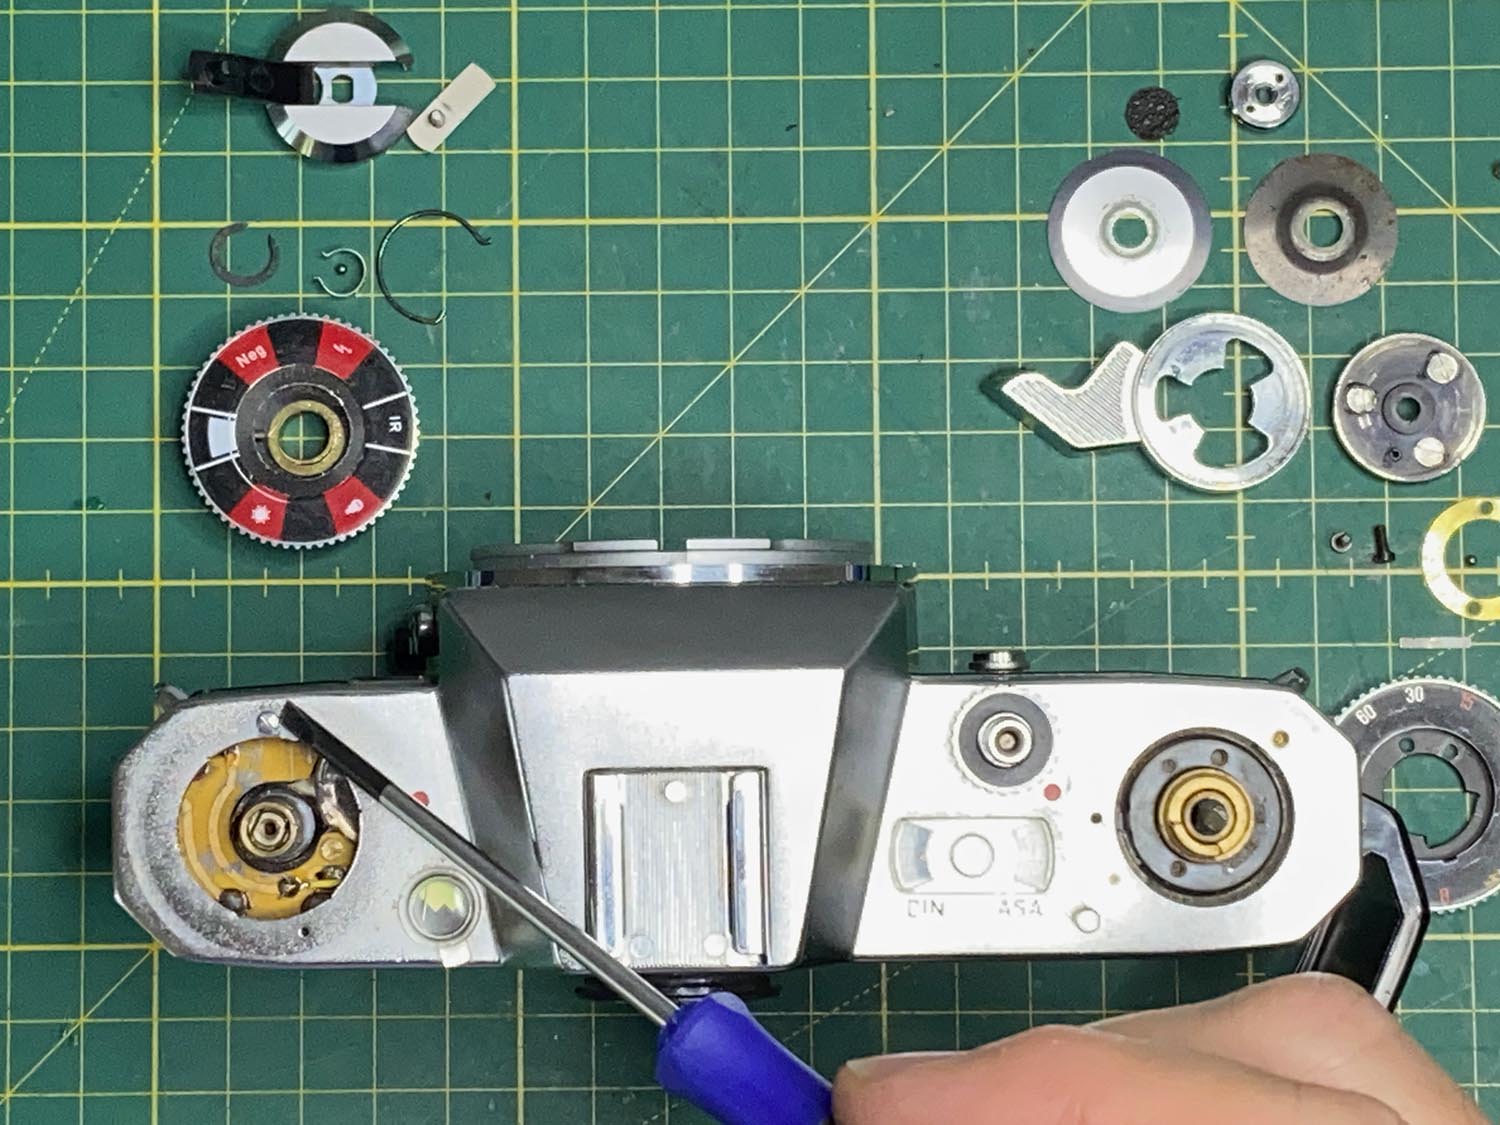
A further retaining screw is now exposed beneath the dial. Remove this screw, and the top cover can then be lifted off carefully.
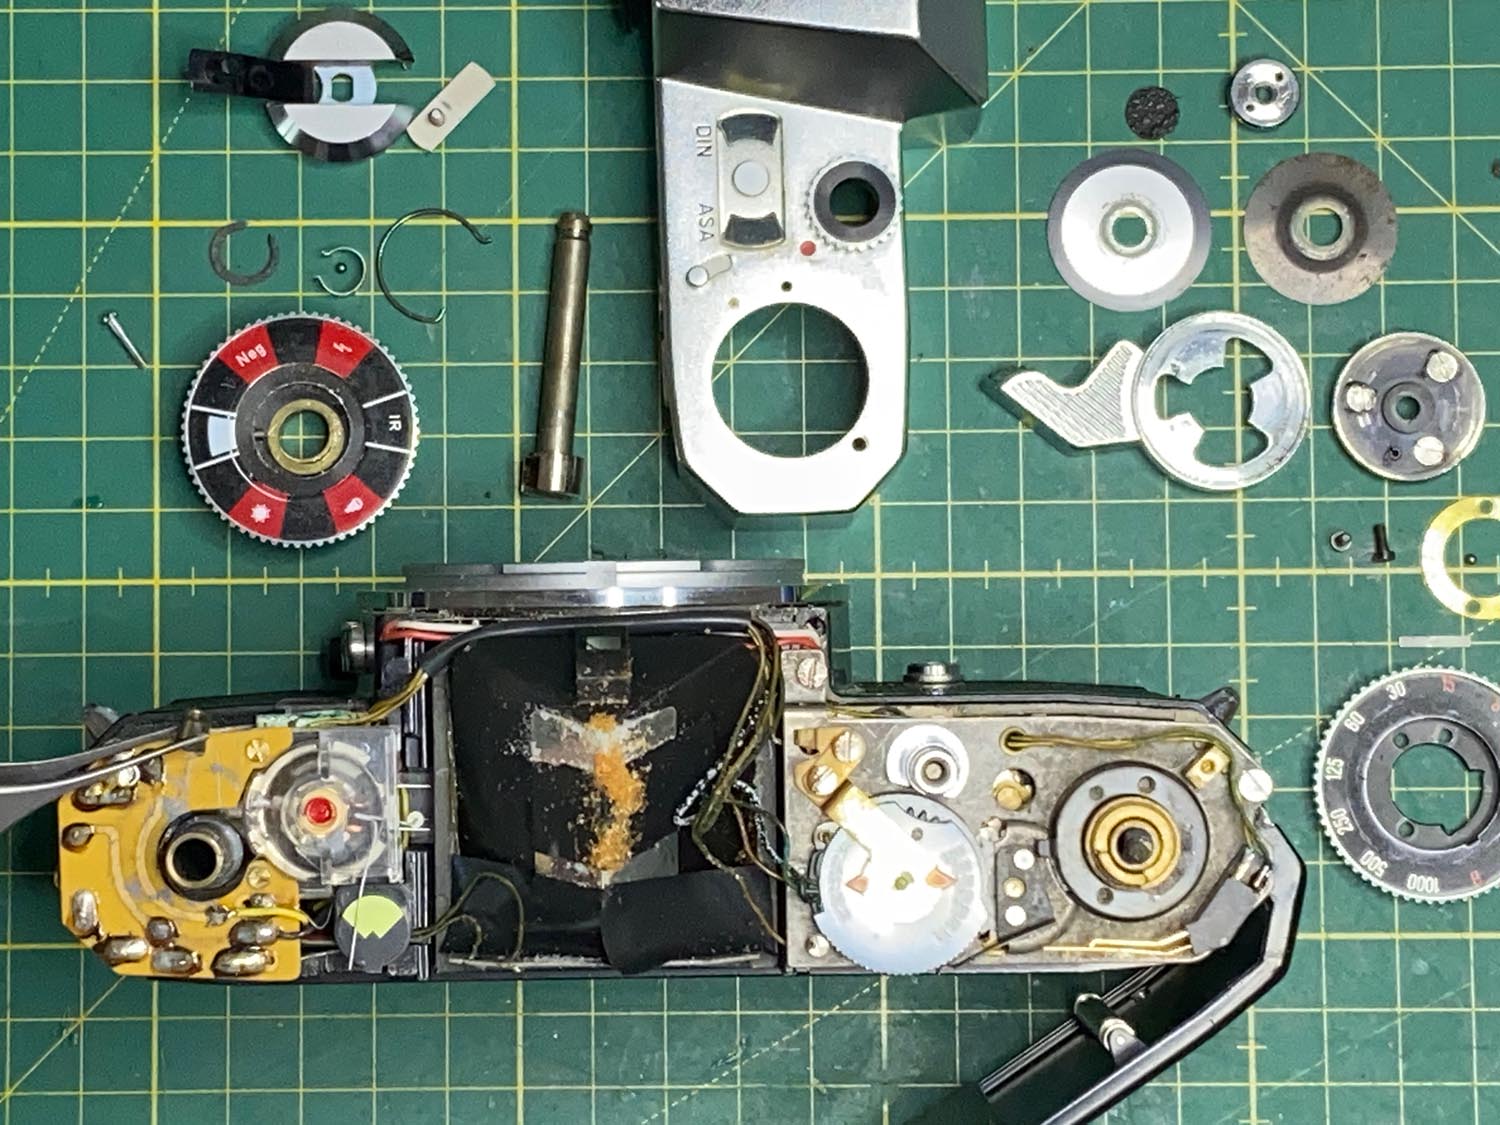
Before lifting off the top cover, check once more that the film speed is still set to 27 DIN / ISO 400. Otherwise, the indicator discs beneath the film speed window may become bent.
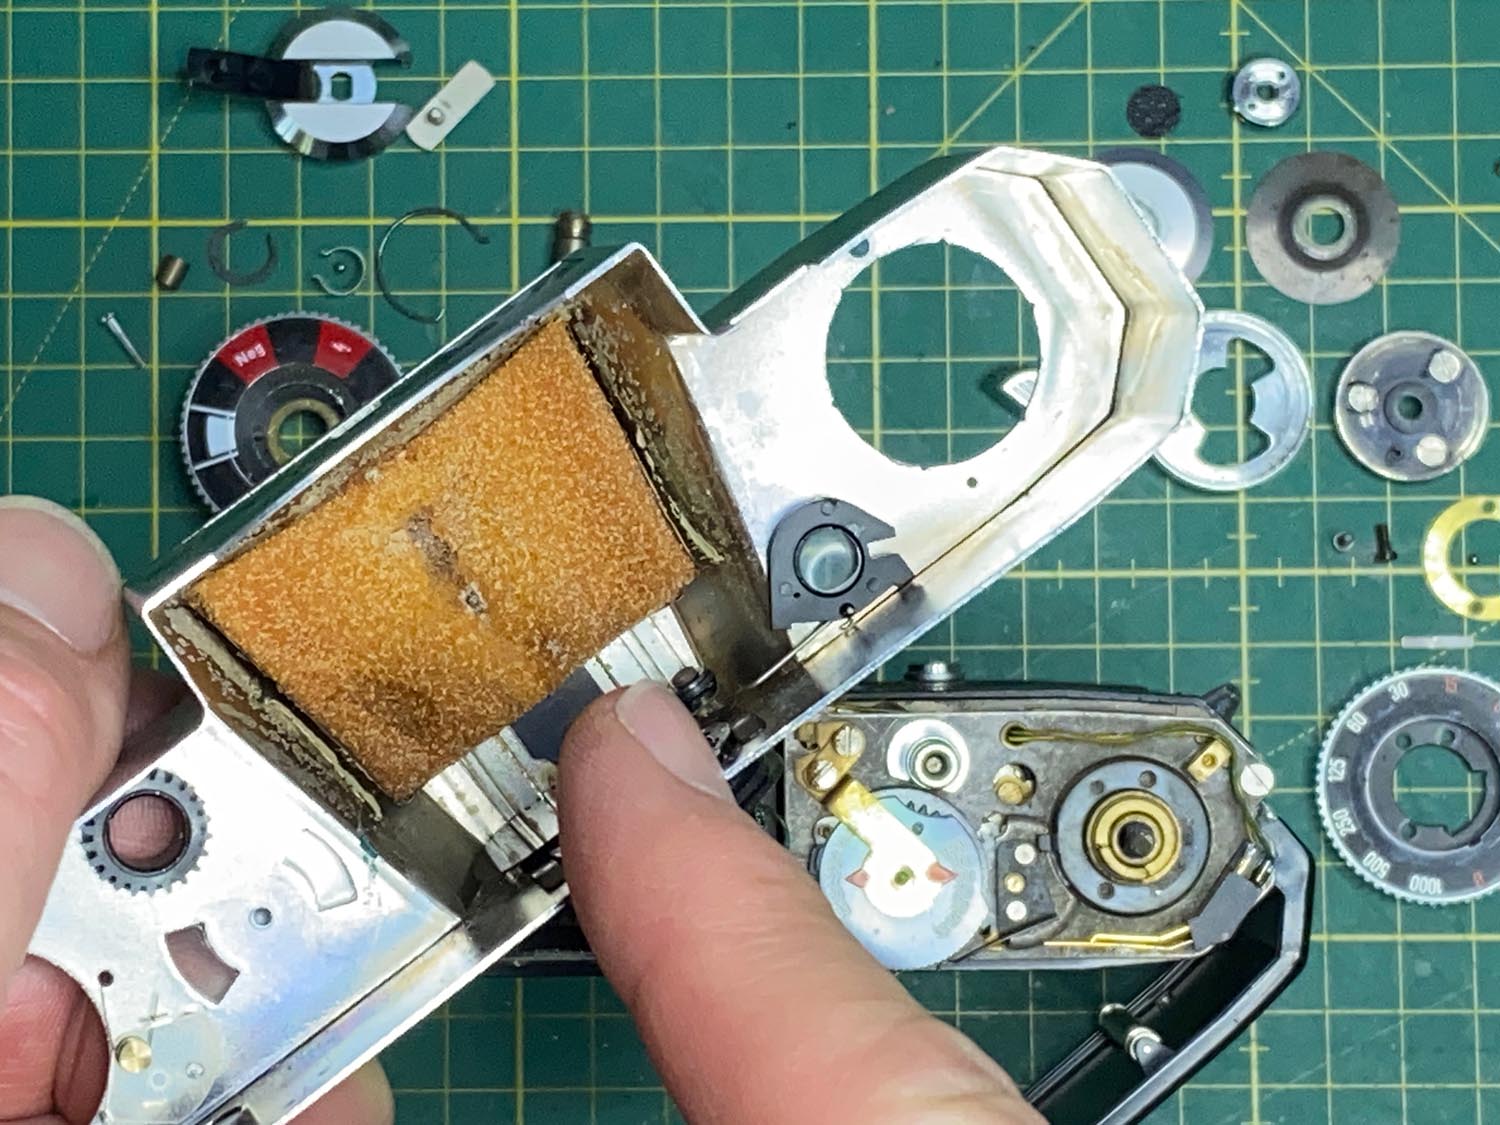
Inside the top cover you will find a small foam pad. Over the decades, this foam usually deteriorates into a sticky, crumbly mess that contaminates the mechanism. Remove it completely, replace it with new foam, and blow out any remaining debris.
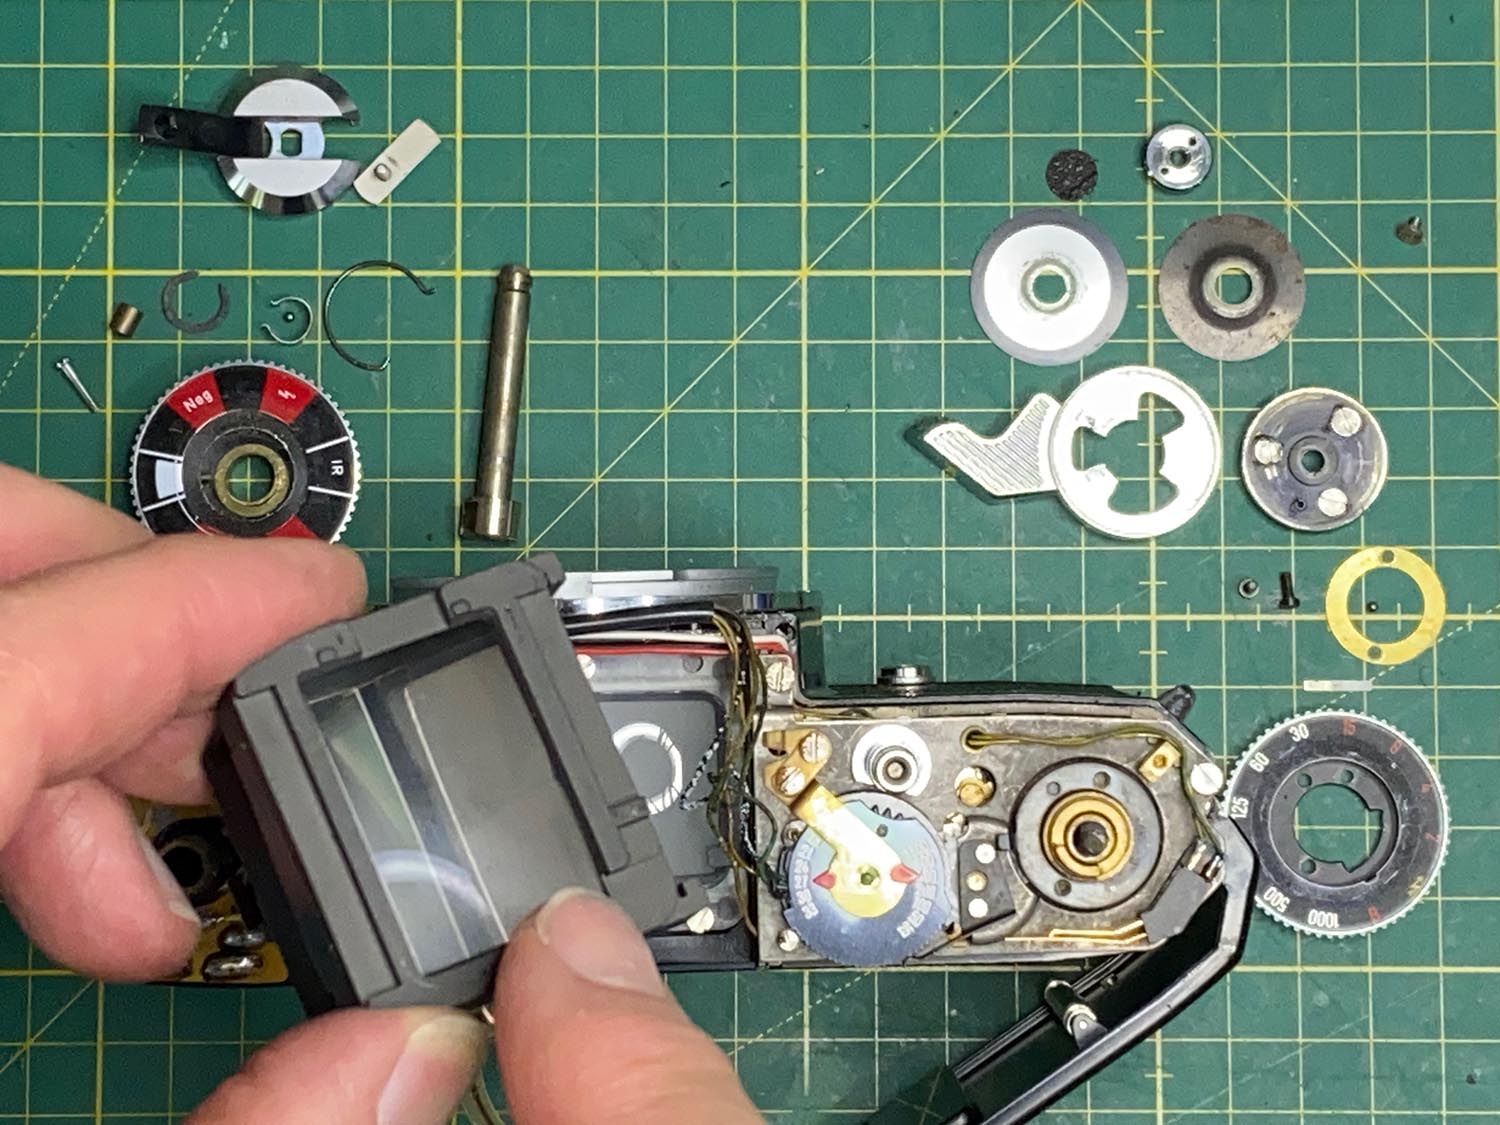
After removing the adhesive tape, the prism can be lifted out without removing any additional screws, allowing it to be cleaned. The focusing screen is now also easily accessible. Take great care not to damage the meter movement.
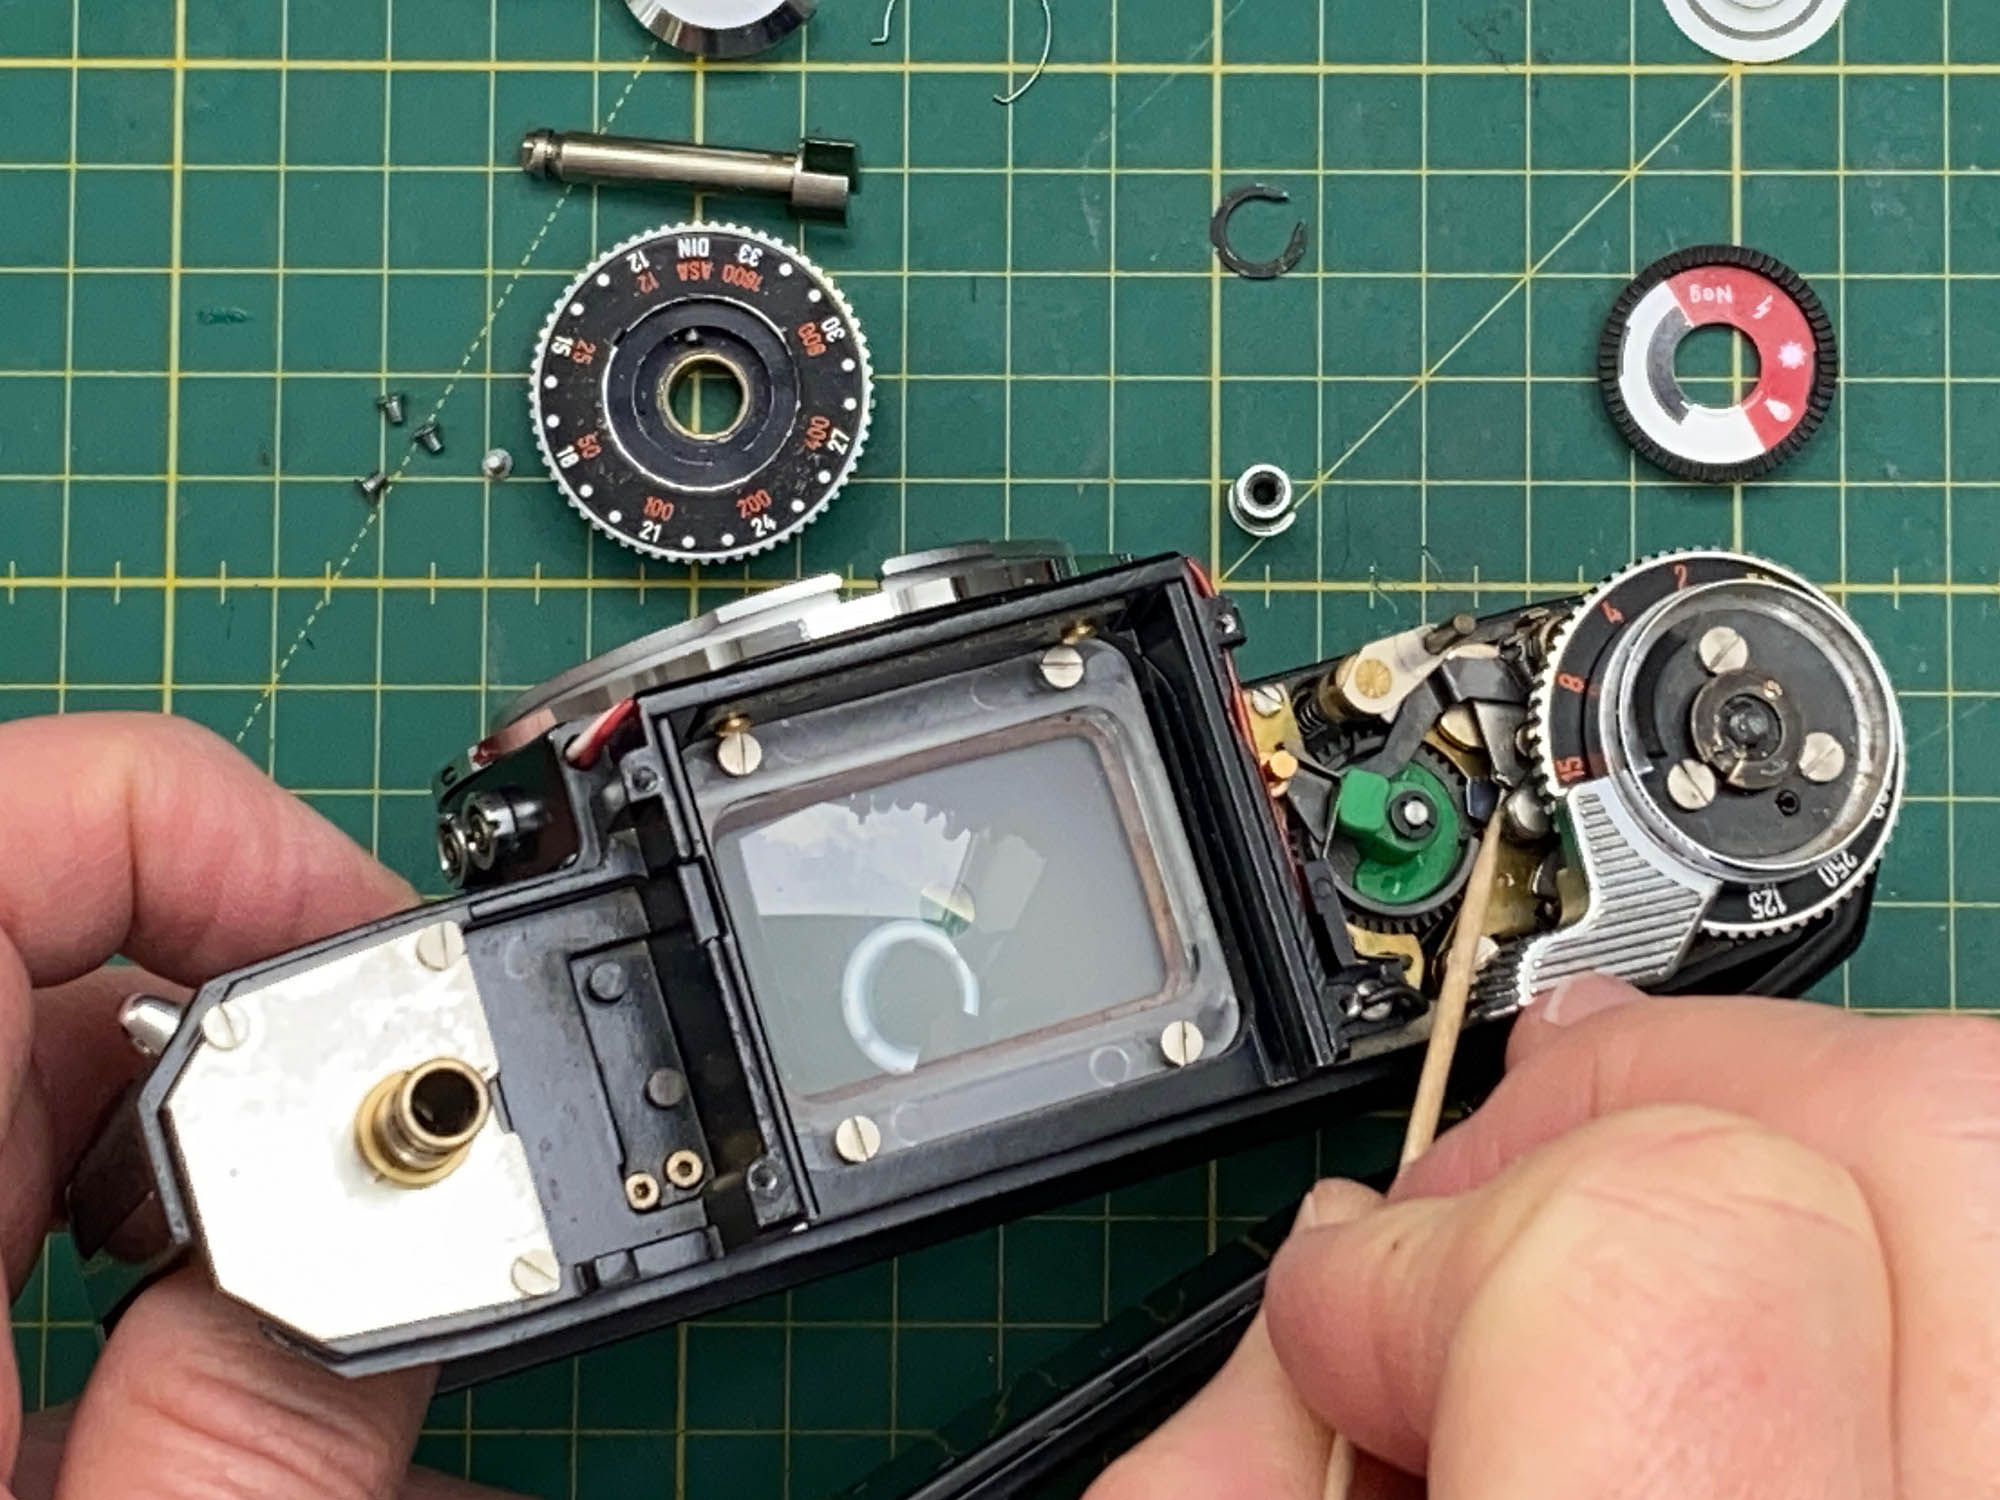
Where to find the slow-speed-escapement?
A common problem with Icarex cameras is that the slow shutter speeds run too slowly. Sometimes the shutter even sticks completely at the slow speeds and fails to close. The cause is usually hardened grease in the so-called slow-speed escapement.
In the photo, I show the exact location of this mechanism. If it is carefully cleaned with a small amount of lighter fluid and worked back and forth repeatedly, then lubricated with only microscopic amounts of oil on the tiny bearings, it will often work properly again.
The Icarex 35 and the Icarex 35S differ slightly in the details of this mechanism, but the basic design is the same.
Contact problems?
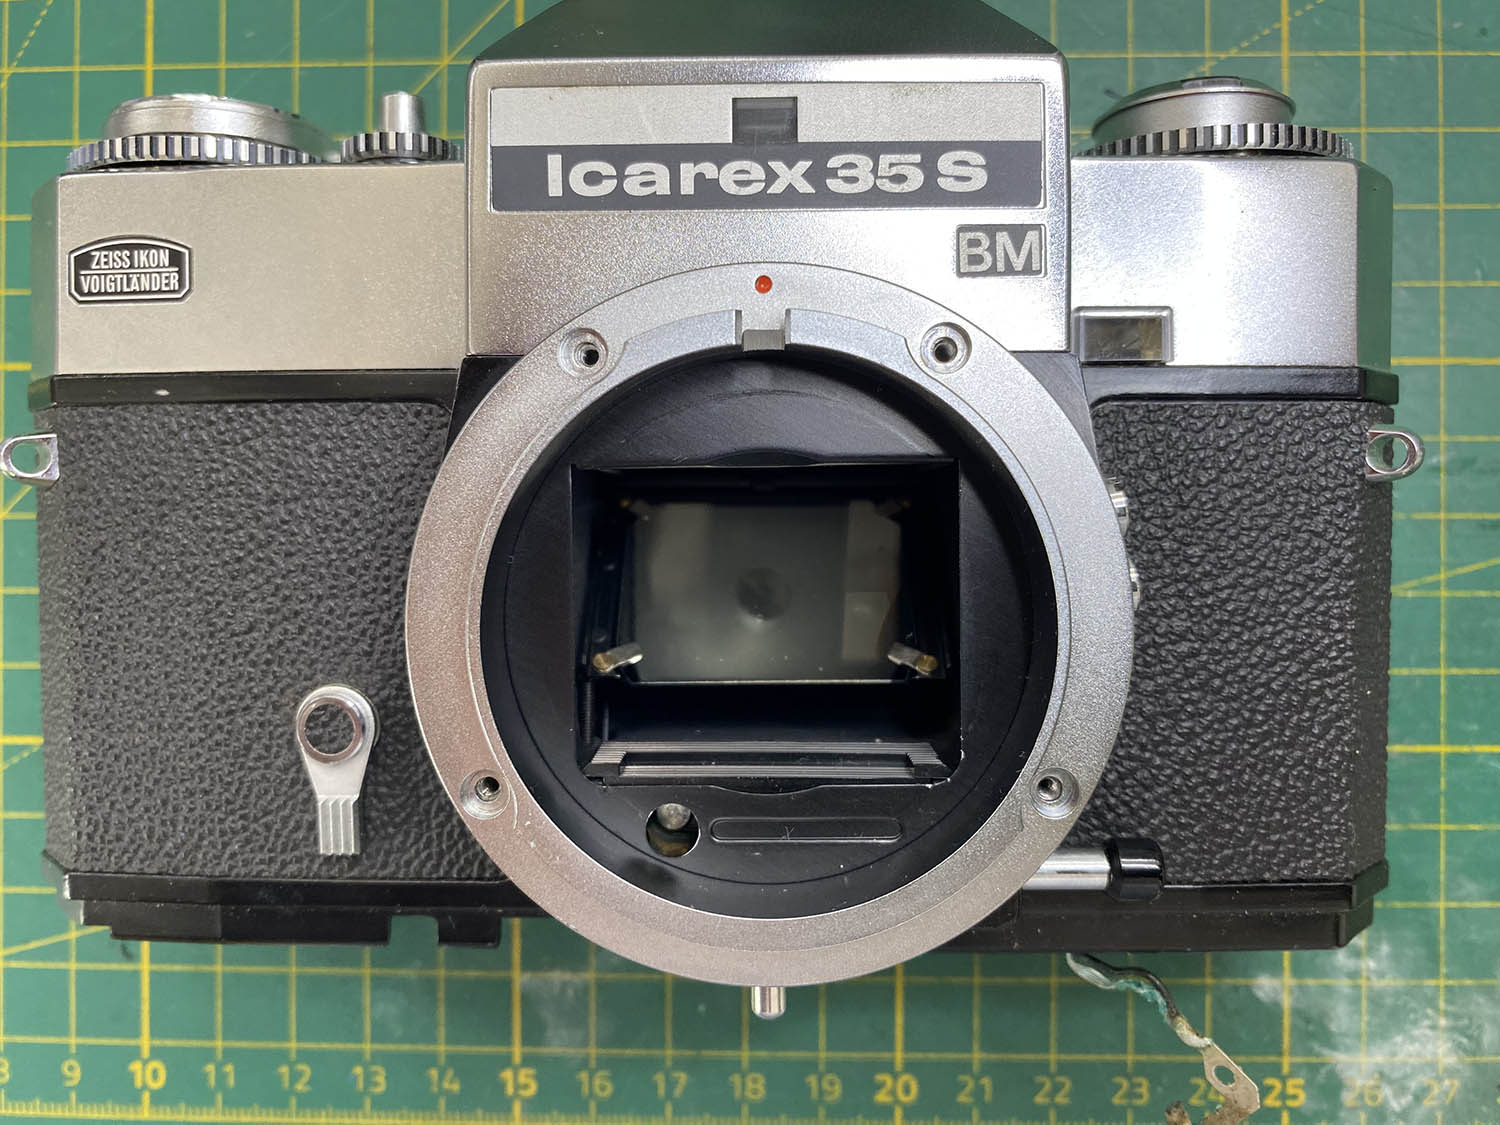
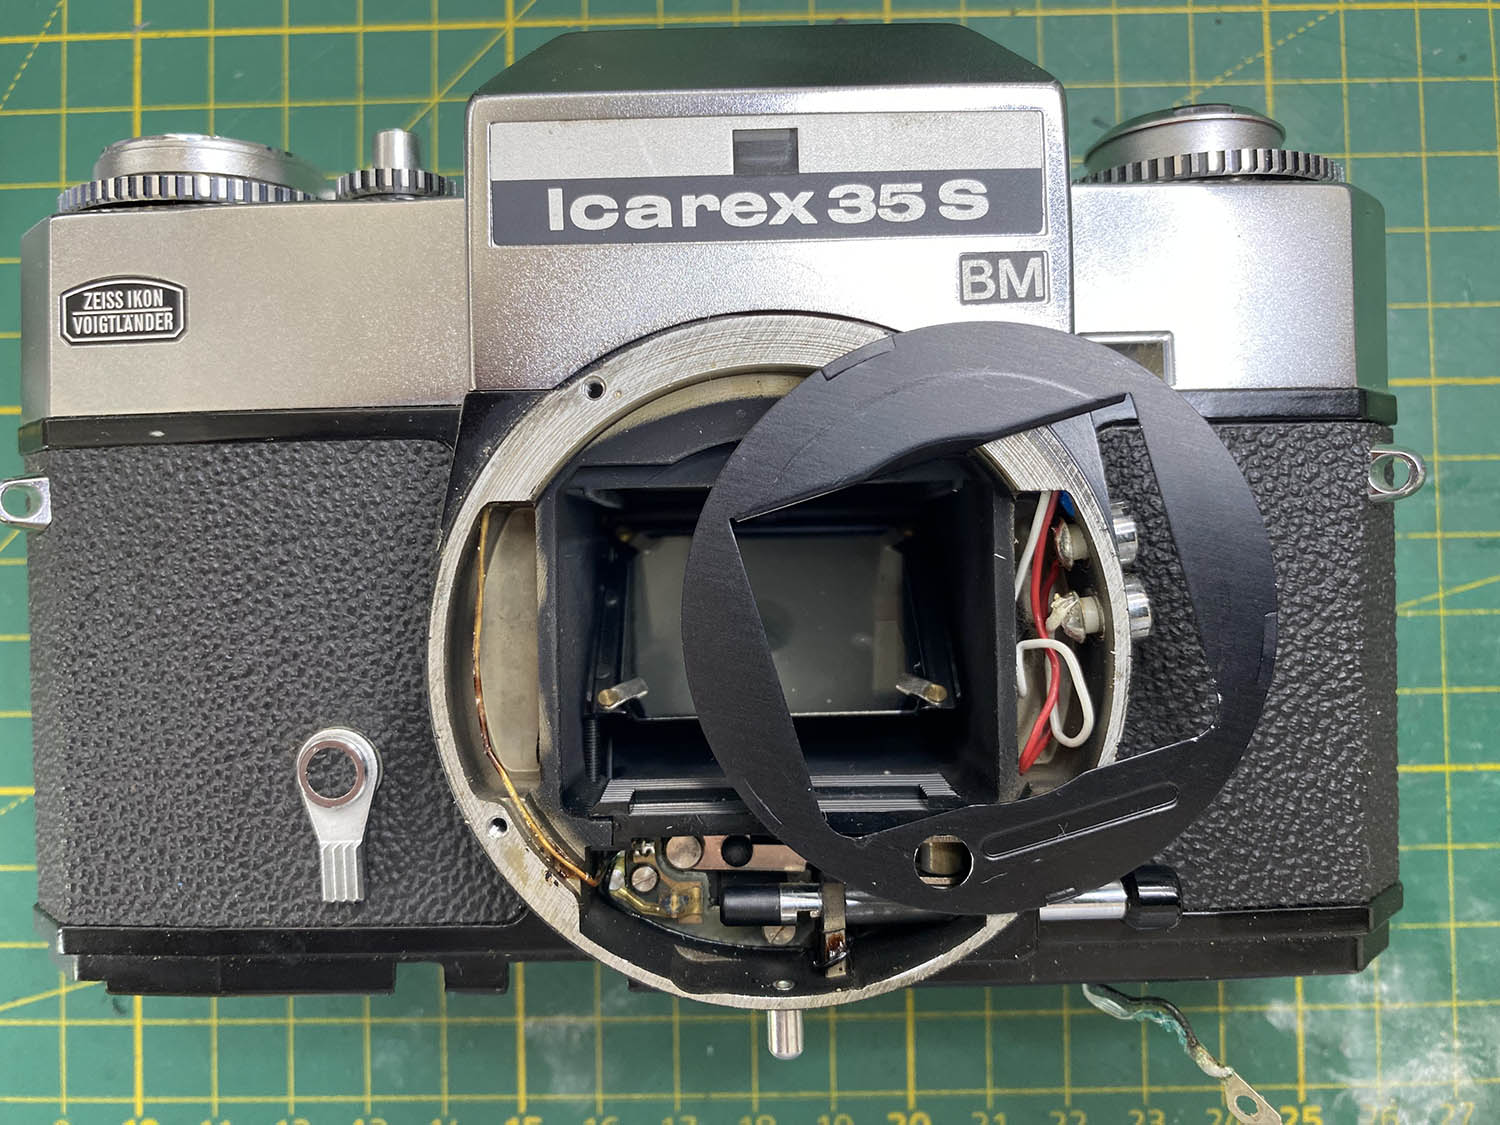
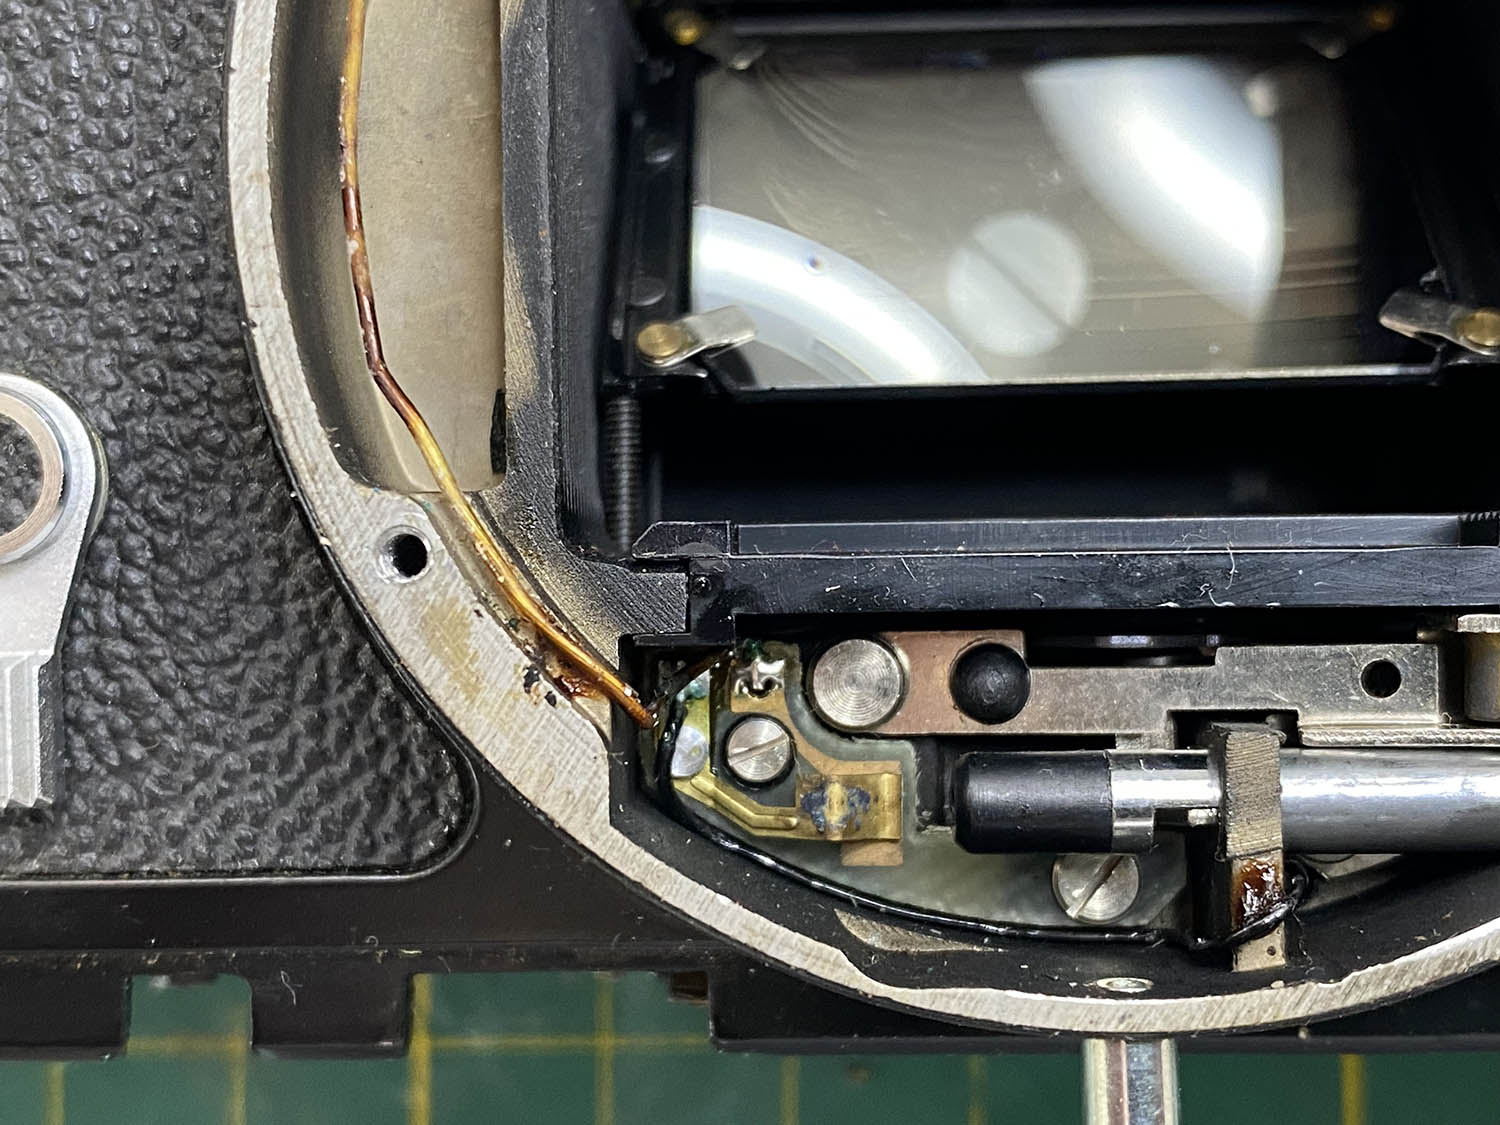
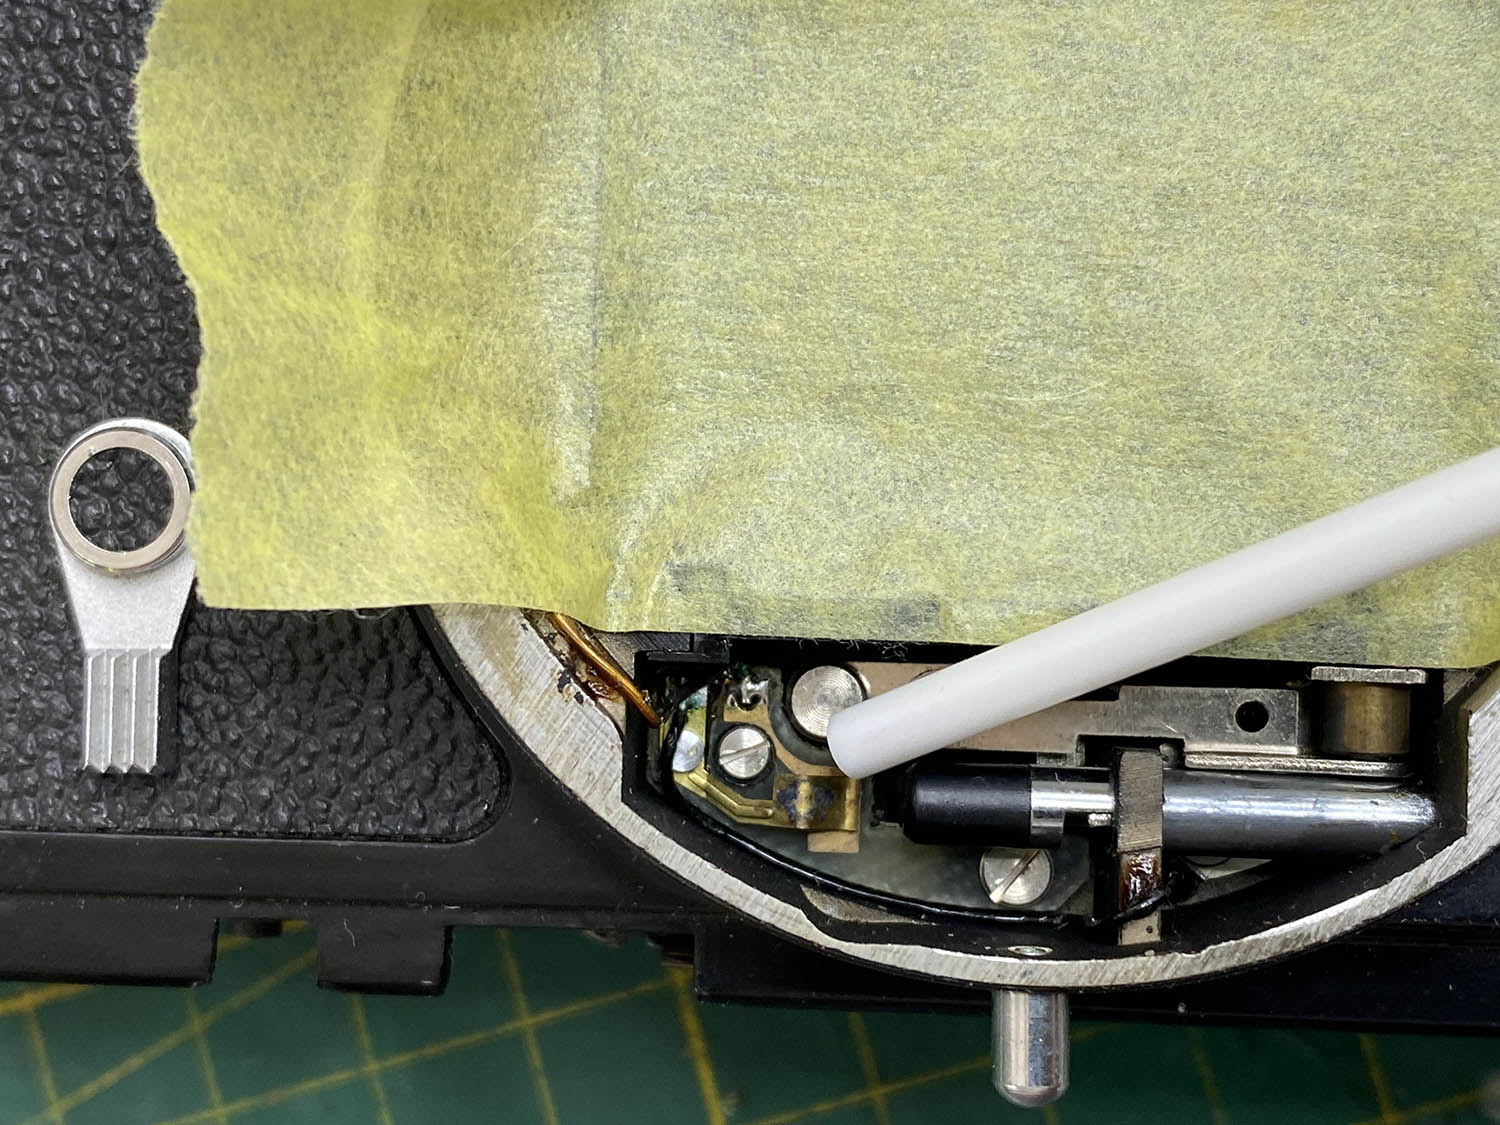
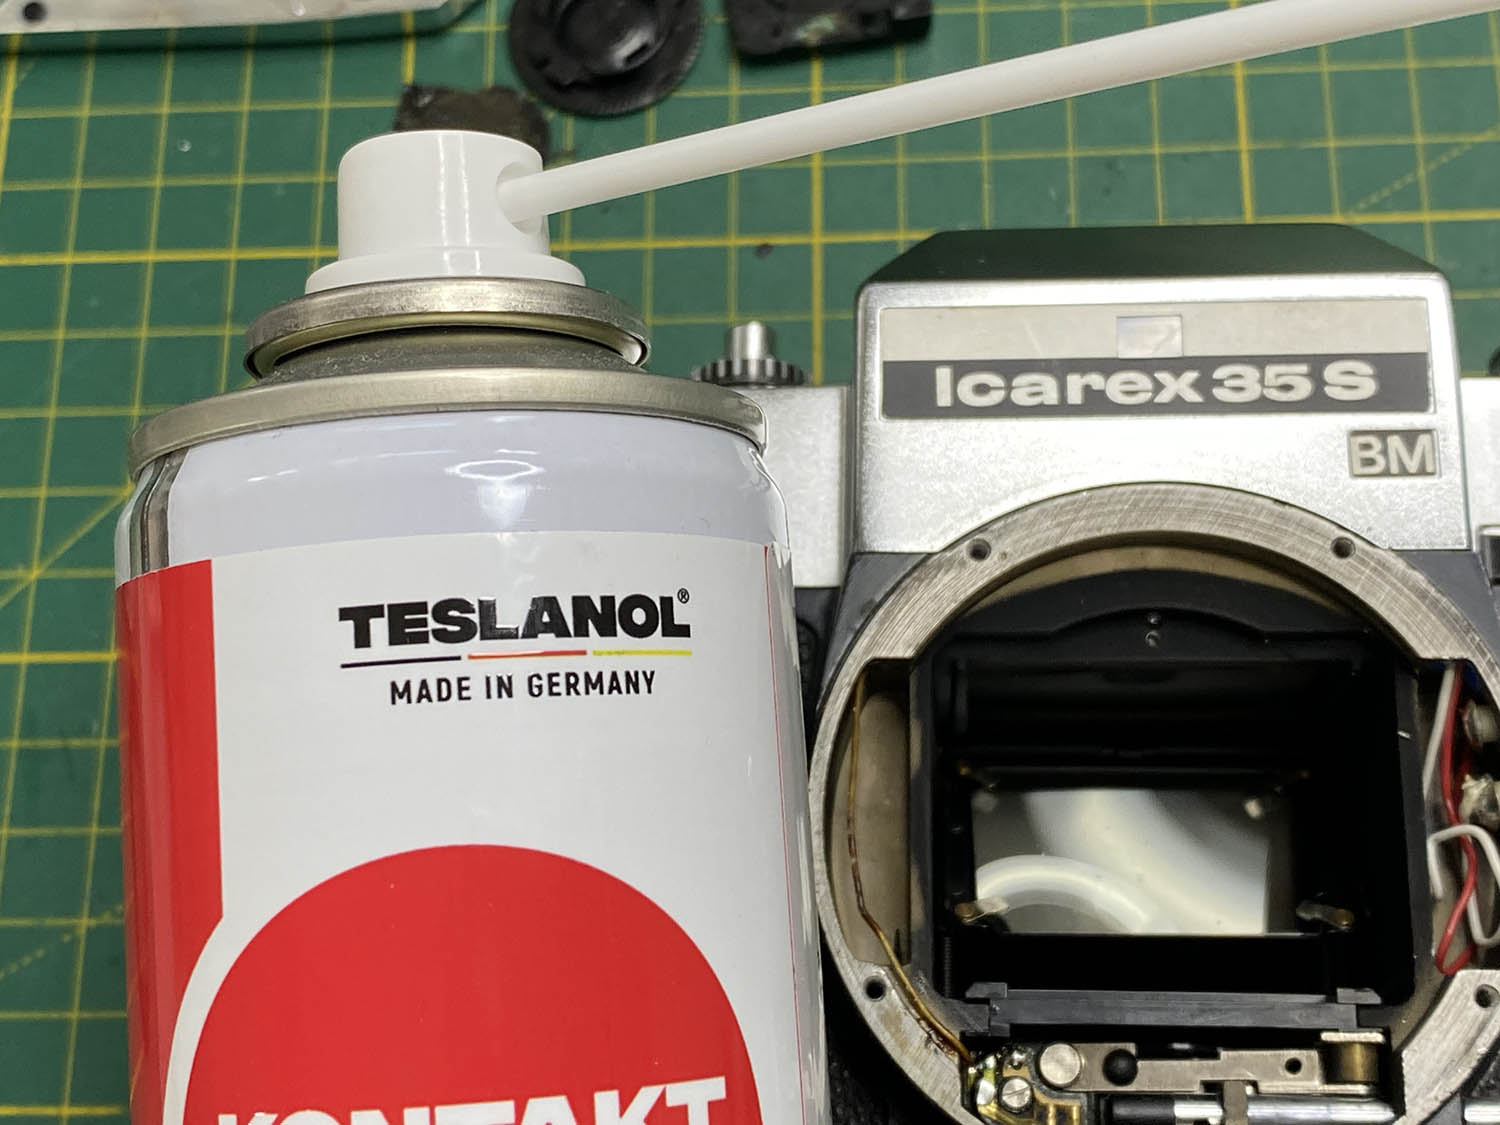
The light meter switch located at the depth-of-field preview lever should always be serviced on an Icarex. Dirt and/or corrosion frequently cause poor electrical contact at this point. The individual steps are shown in the pictures. I use Teslanol Contact Cleaner to clean the contacts. Apply it with a cotton swab (Q-tip) and protect the camera body with masking tape.
Never spray the contact cleaner directly into the camera!
Icarex-links
Although technical and service information about the Icarex cameras is rather scarce on the internet, there are a few websites that provide useful information about their features, specifications and operation. They are worth mentioning here:

 Webseite auf Deutsch
 Website in English
 Hemsida på svenska